
Sealing dry food in a Mylar bag takes a household iron, a flat edge and about ninety seconds per bag. The part that decides whether the food is still good in twenty years is not the seal, it is what went in: dry food (about 10 % moisture or less, per Utah State University Extension), an oxygen absorber sized to the bag, and absorbers that were still fresh when you dropped them in. This guide walks through the method with one kit, and the rules apply to any bag.
Sponsored. This guide features the Wallaby kit under Amazon Creator Connections, a programme in which the brand pays us a higher commission on the paid links below. The method, the warnings and the “before you buy” notes are ours; we would give the same advice with any bag.
Mylar is a trade name that has become the generic word for a foil-laminate pouch: a food-grade plastic layer for strength and a metal layer that, in USU Extension’s words, “dramatically reduces the transmission of oxygen and moisture through the film”. Paired with an oxygen absorber it is the packaging USU lists alongside #10 cans and PETE bottles for long-term storage of rice, beans and grains: polished white rice sealed this way keeps its nutrients and flavour for 25 to 30 years in cool storage, and about 10 years at a steady 70 °F. The bag does the work; you just have to not undo it.
What goes in, and what must never go in
The one rule that overrides everything else on this page comes from USU Extension’s food storage guidance: botulism poisoning may result if moist products are stored in packaging that reduces oxygen. Food sealed with an absorber must be dry, about 10 % moisture or less. That covers white rice, dried beans, rolled oats, wheat, pasta, flour, cornmeal, powdered milk, dehydrated vegetables and commercially freeze-dried food. It does not cover anything you dried at home unless it is brittle-dry, and it never covers nuts, brown rice, whole-grain flours or anything oily (they go rancid, not dangerous, but a 20-year bag is wasted). Sugar and salt do not spoil and do not need an absorber; most storage guides warn that an absorber turns sugar into a brick.
The kit used in this guide
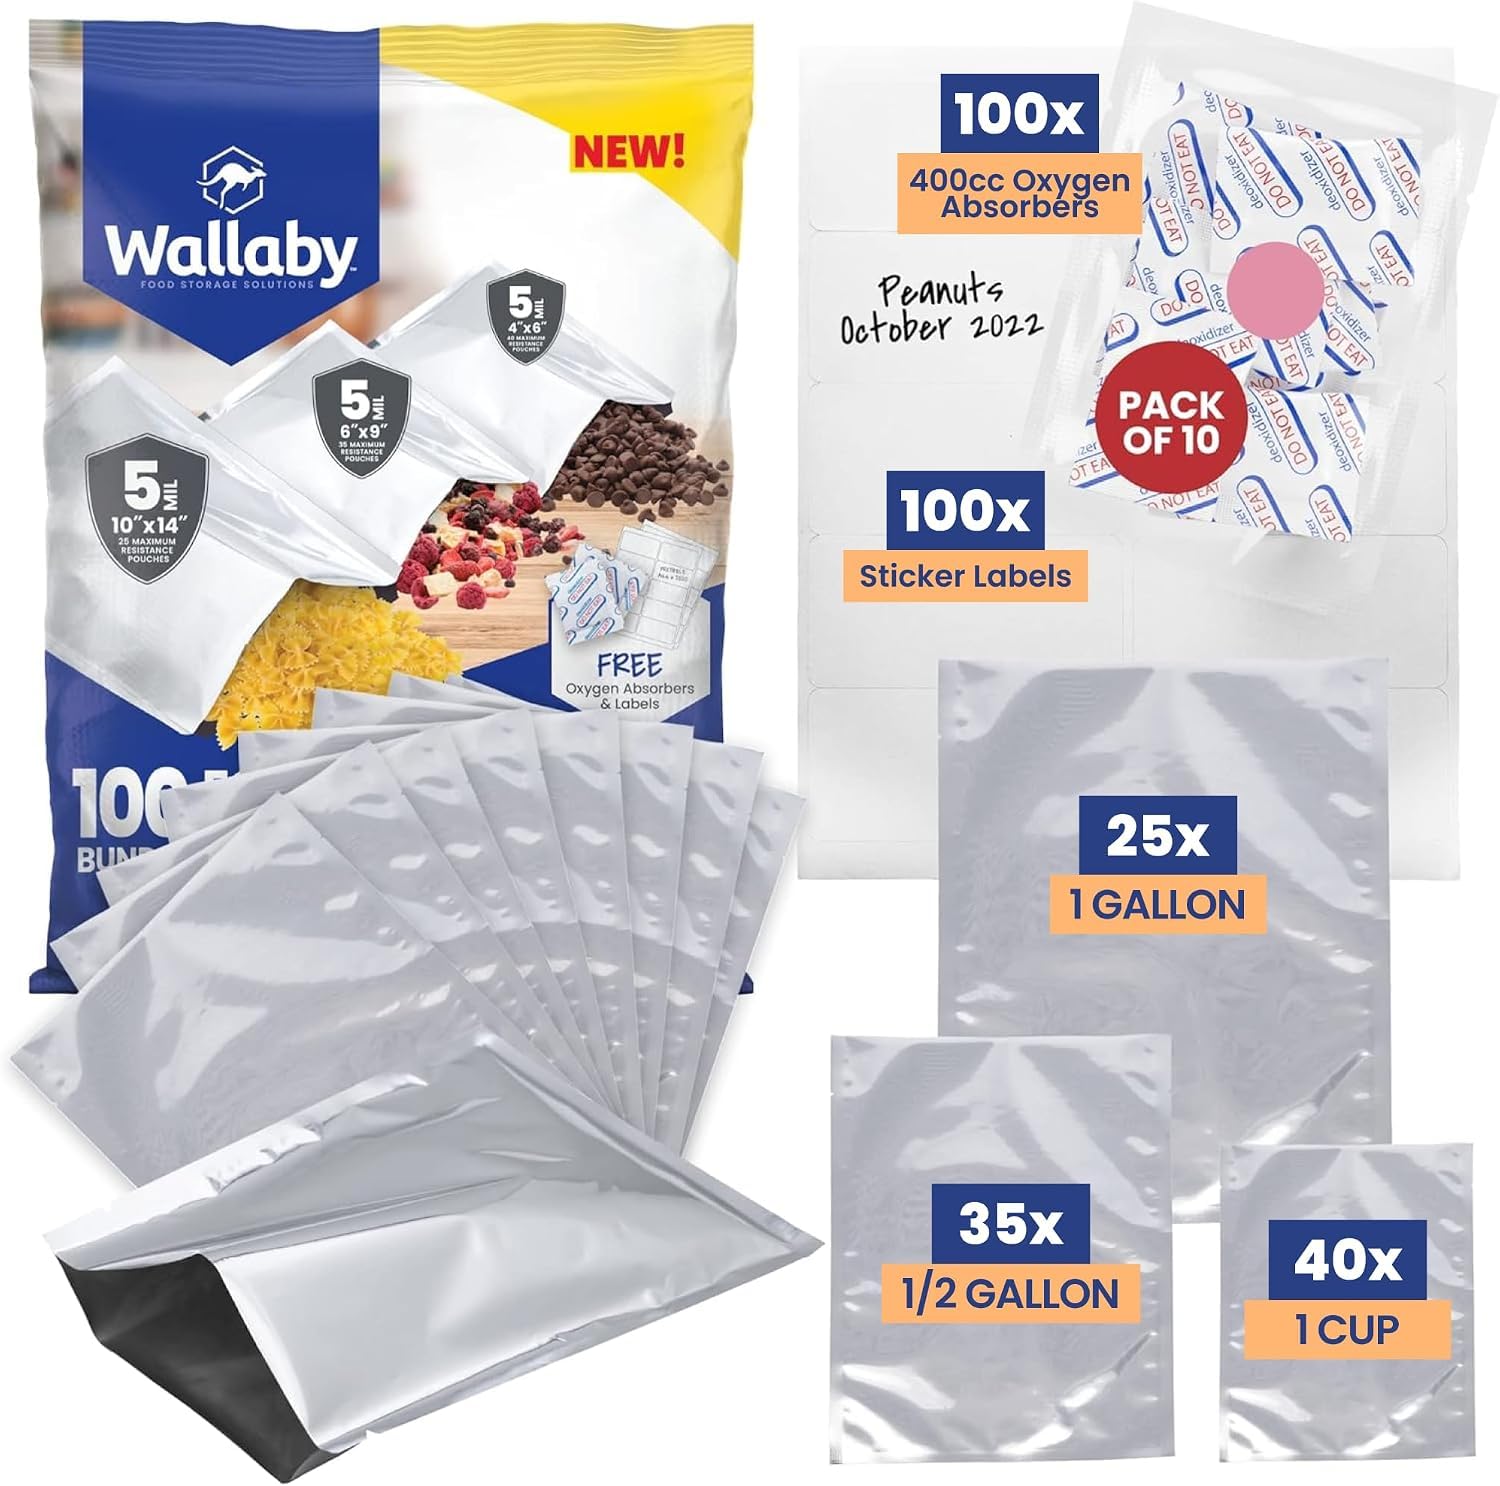
Wallaby multi-size Mylar bags with 400 cc absorbers, 100-pack Sponsored
For: A first pantry, or a household that seals a few bags at a time and wants the absorbers to match
What the listing says: 100 open-top heat-seal bags in three sizes (1 gallon 10×14 in, 1 quart 8×12 in, half-pint 6×8 in), 5 mil per side (10 mil total) with an internal aluminium layer, 100 oxygen absorbers of 400 cc sealed in packs of ten, and 100 sticker labels.
Before you buy: Open-top bags have no zipper, so every bag is a one-shot seal: measure the portion before you start. A 400 cc absorber is generous for a half-pint and right for a gallon; the ten-packs mean you only expose ten at a time, which is the part most kits get wrong.
Why this kit for a how-to: the absorbers come in the box, in sealed packs of ten, and the three bag sizes cover the three portions a family actually seals. If you already own bags, the steps below still apply; check your absorber size against the table.
Which size for which food
| Bag | Holds (approx.) | Use it for | Absorber |
|---|---|---|---|
| 1 gallon (10×14 in) | 6–7 lb white rice, 6 lb dried beans, 4–5 lb rolled oats, 5 lb flour | The staples you eat by the pound; one bag = one week of a family’s grain | One 400 cc packet |
| 1 quart (8×12 in) | 1.5–2 lb rice or beans, 1 lb pasta | The bag you open and finish in a week; the go-bag bag | One 400 cc packet (more than enough) |
| Half-pint (6×8 in) | 4–6 oz: spices, seeds, yeast, powdered milk portions, dehydrated vegetables | Small things that die of humidity first | One 400 cc packet is oversized but harmless; do not cut packets |
A 400 cc absorber removes roughly 400 cc of oxygen. Air is about 21 % oxygen, so it clears a little under two litres of air; a full gallon bag of rice has far less air than that between the grains, which is why one packet per gallon is the usual rule and why the same packet is generous in the small bags. Never divide a packet: cutting it open kills it.
Sealing, step by step
- Set up before you open the absorbers. Bags standing in a box, food measured out, labels written, iron heating (cotton/linen setting, no steam), a flat hardwood board or a metal ruler across the top of a bucket. The absorbers stay sealed until everything else is ready: once the ten-pack is open, the clock is running.
- Fill to about three inches from the top. Tap the bag on the counter to settle the food. Wipe the inside of the top edge with a dry cloth; a single grain of rice in the seal line leaves a channel for air.
- Drop one absorber on top of the food and seal within a few minutes. Open a ten-pack, use ten bags, then start the next pack. Anything you do not use in that session goes into a small jar with a tight lid, and is used within the day, not saved for next month.
- Iron the seal. Lay the top edge flat on the board, press the iron along it for four to six seconds, moving slowly, leaving about an inch of bag above the seal. A good seal looks like a clear, slightly darker band. Squeeze the bag below the seal: if air sighs out, seal again just below.
- Leave a strip for the next time. Seal a second line half an inch above the first if you want a spare; when you open the bag, cut just below the top seal and you can iron it shut again.
- Label and wait a day. Contents, weight, date. By the next morning the bag should have tightened around the food, not shrunk flat: the absorber removed the oxygen, not the nitrogen, so the volume drops by about a fifth. A bag that is still loose after 24 hours got a dead absorber or a bad seal; open it, add a fresh packet, reseal.
The mistakes that let air in
- Opening the absorbers first. They start working on room air the moment the pack is cut. Ten at a time is the whole reason to buy them in ten-packs.
- Expecting a vacuum. An absorber is not a vacuum sealer and will not pull the bag tight around the food like shrink-wrap; a slight firmness is the correct result.
- Sealing over food dust. Flour and powdered milk are the worst; wipe the seal line and fill those bags with a scoop, not by pouring.
- Bags on a bare concrete floor. The foil layer is puncture-resistant, not puncture-proof; a filled gallon bag goes into a lidded bucket or tote, both for rodents and because a bag rubbed against a rough surface for a decade will wear.
- A warm cupboard. USU quotes USDA: every 10.8 °F of temperature rise halves shelf life. Cool, dark and steady beats any bag thickness.
How much to seal
Decide the quantity before the bags, not after. Our free supply calculator sizes water, food and staples to your household and number of days; our prepper pantry guide covers what to store and how to rotate it; and if you want to compare bag styles (zipper gusset bags, bucket liners, bag-and-absorber sets) before choosing, our Mylar bags and oxygen absorbers guide does that without a sponsor.
FAQ
Can I seal Mylar bags without an iron?
A hair straightener works for the small and medium bags and is easier to control than an iron; a dedicated impulse sealer is faster if you do hundreds. A curling iron does not (round surface, uneven seal).
Do I need to add a desiccant as well?
Not if the food is already at 10 % moisture or less. A desiccant does not make wet food safe; it only protects dry food from humidity that gets in, and a sound seal already does that.
How do I know an absorber is still good?
A fresh packet is soft and loose; a spent one feels hard and warm. If a ten-pack arrived puffed up or the packets are stiff, do not use them.
Can I reuse a bag?
Yes, if you left enough material above the seal to cut and iron again. The absorber cannot be reused; add a fresh one each time.
Preparing with Dan is reader-supported: as an Amazon Associate we earn from qualifying purchases. Products marked “Sponsored” (Wallaby) take part in Amazon Creator Connections, a programme in which the brand pays us a higher commission on those links; it does not change our assessment. Product details are as stated on the retailer listing at the time of writing; check the listing before you buy.
Official sources & further reading
The guidance in this article comes from official sources. Consult them directly for the authoritative version:
- Utah State University Extension — 7 Factors That Prolong Your Food Storage Supply (moisture, oxygen, temperature; botulism warning)
- Utah State University Extension — Food Storage Packaging Methods (foil pouches, PETE, oxygen absorbers)
- Utah State University Extension — Storing White Rice (shelf life with oxygen absorbers)

Dan Lockland is a preparedness instructor and survival skills educator with over 15 years of hands-on experience. He shares practical, no-nonsense guidance on emergency preparedness, self-reliance, and sustainable living at PreparingWithDan.com.