
Digging a well by hand is one of the oldest water-access methods in human history, and it remains a viable option for off-grid properties, homesteads, and long-term survival scenarios where municipal water and modern drilling equipment aren’t available. It’s labor-intensive, potentially dangerous, and not always successful — but when it works, a hand-dug well provides a reliable, gravity-fed water source that requires no electricity to operate.
Before You Dig: Critical Assessment
Not every location supports a hand-dug well. Before breaking ground, evaluate these factors:
- Water table depth: Hand-dug wells are practical when the water table is within 30-50 feet of the surface. Beyond that depth, you’ll need mechanical drilling or at minimum a driven well point. Check with your county geological survey, USGS water resources division, or ask neighbors with wells about their water table depth.
- Soil type: Sandy soil, loose gravel, and clay are hand-diggable. Solid rock, heavy boulders, and dense hardpan require mechanical boring equipment. You won’t know exactly what’s below until you start, but soil maps from your county extension office give a reasonable prediction.
- Contamination sources: Your well must be at least 50 feet from any septic system, 100 feet from livestock areas, and uphill from potential contamination sources. This isn’t optional — contaminated groundwater can cause severe illness.
- Legal requirements: Many jurisdictions require well permits, minimum setbacks, and water quality testing. Check your local regulations before digging. In a true SHTF scenario, regulations matter less — but in normal times, an unpermitted well can cause legal problems when you sell the property.
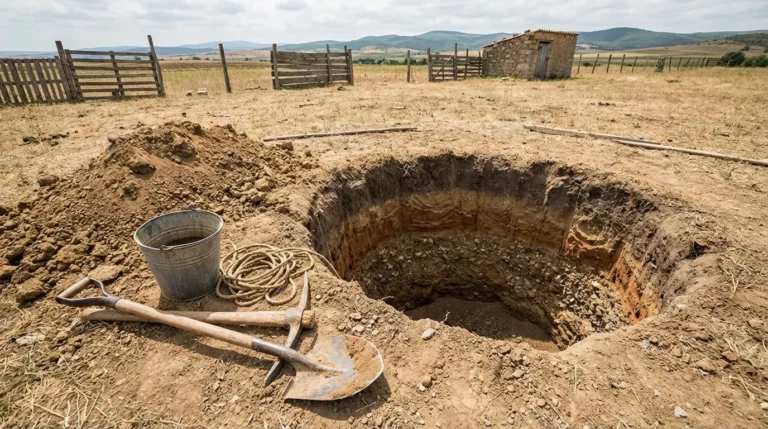
Tools You’ll Need
- Round-point shovel and flat-blade shovel
- Post-hole digger (for the initial narrow shaft)
- Pickaxe or mattock (for rocky soil layers)
- Bucket and rope (for hauling dirt and water from depth)
- Tripod with pulley (essential once you’re below 10 feet — hauling buckets by hand gets dangerous)
- Well casing material: concrete rings (preferred), large-diameter PVC pipe, or stacked stone/brick
- Gravel (for the filter layer around the bottom of the well)
- Concrete or clay (for sealing the top 10 feet to prevent surface water infiltration)
- A hand pump or bucket system for water extraction
The Digging Process
Step 1: Mark and Clear the Site
Choose a location that’s uphill from contamination sources, accessible for regular use, and on relatively flat ground. Clear a work area of at least 10 feet around the dig site. Mark a circle 3-5 feet in diameter for the well opening — wider is easier to work in but requires more digging and more casing material.
Step 2: Dig the Shaft
Start digging straight down, keeping the walls as vertical as possible. Remove soil with a shovel, loading it into buckets for hauling. Once you’re below about 6-8 feet, you’ll need a second person on the surface operating a tripod/pulley system to haul buckets up and lower you down.
Safety warning: Cave-ins are the #1 danger of hand-dug wells. Once you’re below 5 feet, install temporary shoring or start placing your permanent well casing as you go. Never dig alone — always have at least one person on the surface who can pull you out or call for help. Poor air quality (low oxygen, methane) can develop in deep holes — if you feel dizzy, lightheaded, or detect unusual smells, get out immediately.
Step 3: Install the Casing
As you dig, install well casing to prevent the walls from collapsing. Concrete rings (available from well supply companies) are the standard — each ring is typically 3-4 feet in diameter and 2-4 feet tall. Stack them as you dig, letting each ring sink as you remove soil from underneath. In survival situations without commercial materials, you can line the well with stacked stone, brick, or large-diameter corrugated culvert pipe.
The casing serves two purposes: structural support to prevent cave-ins, and filtration barrier to keep surface water from contaminating the groundwater. The top 10 feet of casing should be sealed (grouted with concrete or packed clay) to prevent surface runoff from entering the well.
Step 4: Hit Water
You’ll know when you’ve reached the water table — the bottom of the hole starts filling with water faster than you can bail it. Continue digging another 3-5 feet into the water-bearing layer (aquifer) to create a reservoir. Place a layer of clean gravel (6-12 inches) at the bottom of the well to act as a natural filter and prevent the well from silting up.
Step 5: Finish the Wellhead
Extend the casing 12-24 inches above ground level to prevent surface water, animals, and debris from entering. Build a concrete or stone apron around the wellhead that slopes away from the opening to divert rain and runoff. Install a secure cover — a concrete cap or heavy wooden lid — to keep out animals, children, and contamination. Install a hand pump or set up a bucket-on-a-rope system for water extraction.
Water Quality
Hand-dug wells access shallow groundwater, which is more susceptible to contamination than deep drilled wells. Test the water before drinking — at minimum, test for coliform bacteria, nitrates, and pH. In an emergency without testing capability, treat all well water before drinking: boil for 1 minute at a rolling boil, or use a portable water filter rated for bacteria and protozoa, or treat with purification tablets.
Even after initial testing shows clean water, retest periodically — especially after heavy rain events, flooding, or any disturbance near the wellsite. Shallow wells are vulnerable to seasonal contamination that deep wells avoid.
Yield and Maintenance
A hand-dug well in a decent aquifer typically produces 3-5 gallons per minute — more than enough for a household. However, yield varies enormously by location and season. In dry periods, shallow wells can drop or go dry entirely. Plan for this: maintain a backup water source (rainwater collection, stored water, or a gravity water filter connected to a surface water source).
Annual maintenance includes: checking the wellhead seal for cracks, cleaning debris from the cover and apron, testing water quality, and inspecting the pump mechanism. Every 5-10 years, you may need to deepen the well if the water table drops.
Bottom Line
Hand-dug wells are practical for water tables within 30-50 feet of the surface, in diggable soil, and with proper safety precautions. They require significant labor, at least two people, and appropriate casing materials — but the result is a gravity-fed water source that works without electricity and can serve a household indefinitely. Never dig alone, always case the walls as you go, and test the water before drinking. For the complete picture on emergency water, see our urban water survival guide and our guide to DIY rainwater collection.
Dan Lockland is a preparedness instructor and survival skills educator with over 15 years of hands-on experience. He shares practical, no-nonsense guidance on emergency preparedness, self-reliance, and sustainable living at PreparingWithDan.com.