
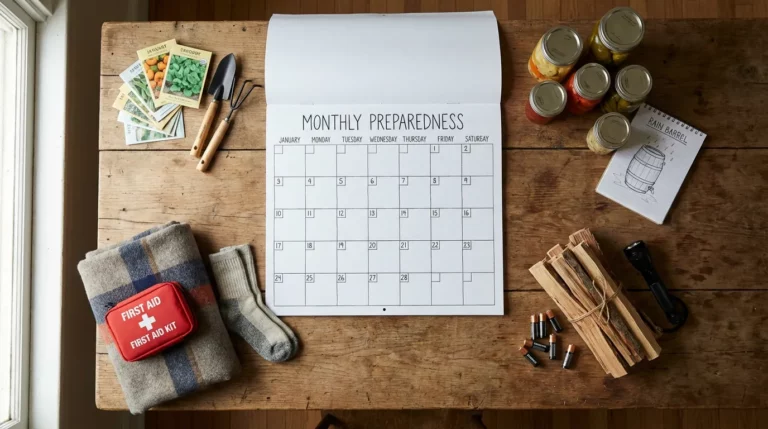
Most preppers stock up in a panic after a news scare, then forget about it for six months. The families who actually survive disruptions do the opposite — they spend 30–60 minutes per month on targeted tasks, and by December they’re genuinely ready for whatever the next year brings. This calendar gives my family of 4 a specific focus for every month of the year, so nothing slips through the cracks.
The Year at a Glance
| Month | Theme | Core Task | Time Investment |
|---|---|---|---|
| January | Inventory & Reset | Full pantry audit + supply rotation | 3–4 hrs |
| February | Food Preservation | Master one preservation method | 4–6 hrs |
| March | Garden Prep | Soil test + seed starting indoors | 3–5 hrs |
| April | Outdoor Skills | First aid recert + fire-starting practice | 4–6 hrs |
| May | Water Systems | Set up rainwater capture + filter test | 4–8 hrs |
| June | Home Security | Full security audit + drill | 3–4 hrs |
| July | Foraging & Wild Food | Identify 5 local edible plants | 4–6 hrs |
| August | Energy Independence | Solar/power audit + efficiency upgrades | 4–8 hrs |
| September | Community Network | Meet neighbors + map local resources | 3–4 hrs |
| October | Fall Harvest & Preservation | Bulk preservation + pantry fill | 6–10 hrs |
| November | Bug-Out Readiness | BOB review + comms check | 3–4 hrs |
| December | Drills & Year-End Review | Full family drill + plan next year | 3–4 hrs |
January: Inventory and Winter Reset
January is the best time for a cold-eyed audit. The holiday rush is over, stores are running post-Christmas sales on canned goods, and you have a clear head to see exactly where your preps stand.
Full Pantry and Supplies Audit
Pull everything out of your storage area. Check every expiration date. Toss anything that’s gone bad (don’t risk it). Make three piles: Good (2+ years left), Use Soon (under 12 months), Replace. The Use Soon pile goes into your regular kitchen rotation immediately — this is how you avoid waste.
My family tracks everything in a simple spreadsheet: item, quantity, expiry date, location. Takes two hours to build the first time; 20 minutes every January after that.
Winter Shelter and Heating Check
Test your backup heat source now, not when the power is already out. Run your propane heater or wood stove for 30 minutes. Check your fuel reserve — my target for a family of 4 is enough for 7 days of heat. Inspect door sweeps and window weatherstripping. Small drafts become big problems at -10°C.
Seed Catalog Review
Order your garden seeds in January while selection is still full. Popular heirloom varieties sell out by March. Focus on high-calorie, high-yield crops: potatoes, beans, squash, and tomatoes. For a family of 4, a 400 sq ft garden with the right varieties can produce 200+ lbs of food in a season.
February: Food Storage and Preservation Mastery
February is indoor time in most of North America. Use it to master one food preservation method you’ve been meaning to learn. Don’t try to master three — go deep on one.
Pick Your Preservation Focus
Three options that work well for a family of 4 without industrial equipment:
| Method | Best For | Shelf Life | Equipment Cost |
|---|---|---|---|
| Pressure canning | Meat, beans, low-acid vegetables | 2–5 years | $80–$150 (pressure canner) |
| Water-bath canning | Jams, pickles, tomatoes, high-acid fruits | 1–2 years | $30–$50 (canning pot + kit) |
| Food dehydrating | Fruits, vegetables, jerky, herbs | 6 months–5 years | $50–$200 (dehydrator) |
My recommendation for beginners: start with water-bath canning. You’ll do a batch of salsa or diced tomatoes in an afternoon, and it directly reduces your store dependency for everyday cooking.
Organize Your Emergency Food Storage
Whatever you store, it needs to be accessible and labeled. Use a FIFO system (First In, First Out) — newer cans go to the back, older ones to the front. Store in a cool, dark area (ideally 10–18°C). Humidity above 70% corrodes can lids; use silica gel packets if your storage area is damp.
March: Garden Preparation and Soil Work
A survival garden won’t feed your family on willpower alone — it feeds your family on prepared soil, started seedlings, and a layout that makes sense. March is when you do the unglamorous work that determines your August harvest.
Soil Testing (Don’t Skip This)
A basic soil test from your county extension office or a $20 home kit tells you pH and major nutrient levels. Most home gardens are either too acidic or nitrogen-poor. Lime raises pH; sulfur lowers it. Add compost now and till it in — it needs 4–6 weeks to break down before planting.
Start Seeds Indoors
6–8 weeks before your last frost date: start tomatoes, peppers, eggplants, and squash. 4 weeks before: start broccoli, cabbage, and lettuce. Use a quality seed-starting mix (not regular potting soil — too dense). A simple $30 grow light keeps seedlings from going leggy in low-light February/March conditions.
Plan Your Garden Layout
For a family of 4 aiming for meaningful food production, prioritize by calories and yield:
- Potatoes: 100 sq ft yields ~50 lbs — your highest-calorie option
- Bush beans: 50 sq ft yields 20+ lbs of protein-rich food
- Zucchini: 2 plants will produce more than you can eat — freeze the rest
- Tomatoes: 6 plants = canning supply for the year if you get 50 lbs/plant
April: Outdoor Skills Practice
Skills decay faster than gear. April is the month to get outside and test what you actually know — not what you think you know.
First Aid Refresher
If your CPR certification is more than 2 years old, renew it — most Red Cross courses are $60–$80 and take half a day. Beyond CPR, practice wound care, tourniquet application, and splinting with your family. My kids (ages 10 and 13) both know how to apply a wound dressing and call for help. That’s realistic capability, not paranoia.
Navigation and Map Skills
Buy a paper topographic map of your county (USGS topo maps, ~$10). Practice identifying your home, your bug-out routes, and your rally points without GPS. Compass + topo map is your fallback when phones and apps fail. Practice this skill in a park before you need it in an emergency.
Fire-Starting Practice
Carry a Bic lighter every day — it’s your primary fire starter. But practice backup methods: ferro rod (1,000+ strikes), waterproof matches, and fire starter cubes. In April, spend 20 minutes in your backyard making a fire using only a ferro rod and natural tinder. If you can’t do it comfortably in good weather, you certainly can’t do it in the rain at night in November.
May: Water Collection and Filtration Systems
May brings spring rains — perfect timing to set up and test your water independence systems. Your family of 4 needs 1 gallon per person per day minimum (2 gallons for comfort + hygiene). That’s 8 gallons a day, 56 gallons a week. Water is heavier than gear — you need a plan to collect and filter it locally.
Set Up a Rainwater Collection System
A 55-gallon rain barrel ($50–$100 at most hardware stores) attached to a downspout collects roughly 0.6 gallons per square foot of roof per inch of rain. In most of North America, a single average rainstorm fills a 55-gallon barrel. Use a first-flush diverter ($20) to keep the first dirty flow from entering your barrel. Add a spigot at the bottom for easy access.
Test Your Water Filtration
Pull out your Sawyer Squeeze or Berkey filter and actually use it. Filters can clog or fail if they’ve been sitting unused — better to find out in May than in August. Check your Aquatabs supply (water purification tablets, $10 for 50). Replace if expired. Make sure every family member knows how to use each filtration method.
Water Storage Best Practices
- Use food-grade containers only (HDPE plastic labeled with recycling code #2)
- Rotate stored water every 6–12 months
- Store in a cool, dark location — heat and UV degrade plastic over time
- Never store water in containers that previously held non-food products
June: Home Security Audit
June is when people are traveling, houses are being left empty, and security lapses happen. Spend one evening walking your home like a criminal would — where are the weak points?
Physical Security Improvements
The most cost-effective security upgrades for a family home:
- Door reinforcement kit (~$30, Door Armor or similar): Reinforces the door frame at strike plate — where 90% of forced entries happen
- Window locks: Add secondary pin locks to all ground-floor windows; $3 per window
- Motion-sensor lights: $25–$40 each; cover all entry points
- Security camera (1–2): A visible camera on the front and back doors deters most opportunistic break-ins
Situational Awareness as a Family Habit
Security isn’t just hardware — it’s habits. Teach your family the basics: vary your routine, notice what’s normal in your neighborhood so you notice what isn’t, don’t announce travel plans on social media, and know your neighbors well enough to call them if something looks wrong.
Community Watch Coordination
If your neighborhood doesn’t have a watch program, now is the time to start one. Even informal — a group text with 4–5 neighbors who agree to alert each other about suspicious activity — works better than any single household alarm system.
July: Foraging and Wild Edibles
July is peak season for wild edibles across most of North America. I’m not suggesting you plan to survive on foraged food — I’m suggesting you learn to identify a handful of local plants so that if you ever need to supplement, you can. More practically: it’s free, fresh, and wild-foraged food can’t be disrupted by supply chains.
Start With 5 Plants
Don’t try to memorize a field guide. Pick 5 plants common to your specific region and learn them thoroughly — season, appearance, look-alikes, and preparation. Good starting plants in most of North America:
- Dandelion: Leaves (salad, greens), roots (coffee substitute), flowers (fritters) — no dangerous look-alikes
- Lamb’s quarters: Tastes like spinach, grows everywhere as a “weed” — very easy ID
- Blackberries/raspberries: Easy to identify, high-calorie, excellent for preserving
- Purslane: Most nutritious wild plant in North America — omega-3s, vitamins A and C
- Cattail: Multiple edible parts (pollen, shoots, roots) — found near any water source
Safe Foraging Practices
The golden rules: never eat anything you’re less than 100% certain of, forage away from roadsides (vehicle exhaust) and sprayed areas, take only what you’ll use, and always use two identification methods (field guide + photo app like iNaturalist).
August: Energy Independence
August typically means high electricity demand, grid stress, and more frequent brownouts in heat-prone regions. It’s the ideal month to audit your energy situation and make improvements before winter.
Solar Power Assessment
A full whole-home solar installation is a major investment ($15,000–$25,000). But for a prepper’s starting point, a portable power station + solar panels is accessible ($300–$800 range). The Goal Zero Yeti 500X or EcoFlow RIVER 2 Pro with a 100W panel can run lights, phone charging, a small fan, and a CPAP machine for 1–3 days of typical use. That covers 80% of power outage needs.
Energy Efficiency Audit
Reducing consumption makes any backup power system go further. In August, check:
- Are all lightbulbs LED? (10W LED = equivalent to 60W incandescent, runs 6x longer on stored power)
- Do you have a programmable thermostat? (Saves 10–15% on heating/cooling bills)
- Any phantom loads? (Electronics on standby draw power 24/7 — use smart power strips)
Fuel Storage Review
Check your propane, gasoline, and diesel reserves. Gasoline degrades in 3–6 months without stabilizer (add PRI-G or STA-BIL at storage). Rotate fuel before it goes bad. For a family of 4, I target 25–30 gallons of treated gasoline — enough to run a generator for 100 hours or make multiple evacuation trips.
September: Community Network Building
The research on disaster recovery is clear: neighborhoods with strong social ties recover faster and lose fewer lives. Gear matters — but knowing your neighbors matters more.
Map Your Neighborhood’s Resources
Walk your street and note what skills and resources your neighbors have: medical professionals, mechanics, people with generators, people with large properties, people who can garden. You don’t need to have a prepper conversation to gather this information — it comes out naturally in normal neighbor relationships.
Join or Form a Local Preparedness Group
CERT (Community Emergency Response Team) training is free in most U.S. cities and gives you FEMA-certified disaster response skills. Neighborhood associations, church groups, and local Facebook groups often have informal preparedness networks. Even a text group with 3–4 neighbors who agree to check on each other during power outages is genuinely valuable.
Plan a Community Training Day
Organize one afternoon event — a backyard BBQ where you set up a few stations: basic first aid, fire-starting demo, food storage show-and-tell. Keep it low-key and practical. People who feel empowered by preparedness, rather than frightened, are more likely to actually prepare.
October: Fall Harvest and Preservation Push
October is the busiest prep month of the year if you’ve planted a garden. It’s also the best time to buy in bulk — stores discount produce to clear summer inventory, farmers’ markets run end-of-season sales, and bulk food stores have fall promotions.
Preservation Marathon
Use October to process and preserve your garden harvest and any bulk buys. Priority items to preserve in October:
- Tomatoes: Pressure-can diced tomatoes and salsa — use all summer
- Apples: Dehydrate for chips, can as applesauce, or make apple butter
- Root vegetables: Carrots, beets, and potatoes keep well in a cool basement without any processing
- Winter squash: Cure and store (lasts 3–6 months in a cool, dry spot)
Winter Pantry Stocking
October bulk buys that make financial sense: flour (50 lb bags, ~$25), rice (50 lbs, ~$30), dried beans (25 lbs, ~$20), oats (50 lbs, ~$35). Store in 5-gallon food-grade buckets with Gamma-Seal lids and oxygen absorbers. This fills your pantry for winter at 40–50% lower cost than buying small packages.
November: Bug-Out Bag Review and Communications
Before winter locks in, November is the time to audit your go-bags and communication systems. The weather gap between fall and true winter is your last easy window to do outdoor testing.
Bug-Out Bag Seasonal Swap
Every BOB needs a summer and winter configuration. In November, swap:
- Add: wool base layer, hand warmers, balaclava, heavier gloves
- Add: SOL emergency bivy or sleeping bag liner for cold-weather shelter
- Check: water filters (remove and store indoors if freeze risk), replace with Aquatabs
- Check: food bars (do they handle cold temps?), batteries (cold reduces capacity by 20–40%)
Communications Check
Test every communication device in your kit: NOAA weather radio (replace batteries), walkie-talkies (charge and test range), satellite communicator if you have one (test check-in). Confirm your family emergency communication plan — out-of-state contact person, rally point #1 (near home), rally point #2 (out of neighborhood).
Document Backup
Make digital copies of critical documents (IDs, insurance policies, property deeds, medical records, prescriptions) and store on an encrypted USB drive. Keep one copy with your BOB, one in a fireproof safe at home, one with a trusted family member off-site.
December: Family Drills and Year-End Review
December closes the loop. You’ve spent 11 months building skills and supplies — now you test them with a real drill and plan what to improve next year.
Run a Full Family Drill
Choose one evening and run a power-out scenario for 4–6 hours. No electricity from the panel (flip the breaker). Your family cooks on the camp stove, uses headlamps and lanterns, checks on communication plans, and practices without phones for one hour. Debrief afterward — what worked? What was missing? What was harder than expected?
Year-End Audit and Planning
Review each month of the calendar: what did you complete? What did you skip? What did you learn? Set 3 specific prep goals for next year — not vague goals like “get better prepared,” but specific ones like “complete CERT training in March” or “can 50 lbs of tomatoes in October.”
Common Mistakes Preppers Make with Annual Planning
1. Trying to do everything in January
The burst of New Year’s energy leads families to spend $500 on gear in January, then do nothing for 11 months. Monthly focus prevents this. One task done thoroughly beats ten tasks started and abandoned.
2. Planning for scenarios instead of fundamentals
Nuclear EMP, zombie apocalypse, grid-down scenarios — these make for interesting prep content, but the 99% use case is a 3-day power outage or a week of illness. Build fundamentals first: food, water, warmth, light, communication. Exotic scenarios come after the basics are solid.
3. Ignoring community in favor of gear
The lone wolf prepper fantasy falls apart in real disasters. You cannot be awake 24/7, maintain a homestead solo, and manage a medical emergency at the same time. Community multiplies your capability. Every September, the families who did community networking consistently outperform the families who bought more storage containers.
4. Not rotating supplies
Canned goods stacked in a corner and forgotten for 5 years. Filters never tested. Batteries dead in the flashlight. Your preps are only as good as their current state — not the state they were in when you bought them. The January audit forces rotation and keeps everything functional.
5. Keeping the plan in your head
Write down your family emergency plan. Where you meet. Who you call. What you grab. What the kids do if they’re at school. Stress degrades memory — a laminated one-page reference sheet beats memory every time.
FAQ
How much time per month does a realistic prep calendar actually take?
For a family of 4 starting from scratch: expect 4–6 hours per month in year one, dropping to 2–3 hours in year two as systems are established and you’re mostly maintaining rather than building. That’s less time than most families spend on one Netflix weekend.
What if I’m behind — can I catch up on missed months?
Absolutely. The calendar is a guide, not a rigid schedule. If you’re reading this in July and haven’t done January through June, start with the most impactful gaps: food storage, water, and communication plan. Work backward through missed months in any order that fits your current season and circumstances.
Can I adapt this calendar for an apartment?
Yes, with adjustments. Garden sections become container gardening or community garden plots. Rainwater collection may not be legal or practical — increase stored water instead. Energy sections focus on portable power rather than rooftop solar. The security and community sections apply even more strongly to apartment dwellers. The fundamentals — food, water, warmth, communication — apply everywhere.
How do I get my partner or family on board with this?
Frame it around real scenarios they already worry about: job loss, ice storm, power outage, illness. Most people are fine preparing for “bad weather and disruptions” — they just don’t connect that to “prepping.” Start with one task they care about (food storage saves grocery money; security upgrades reduce anxiety). Let the practical wins build momentum.
What’s the most important month if I can only do one?
January. The inventory and audit tells you exactly where your gaps are, forces rotation of supplies, and gives you a realistic picture of where you actually stand. Everything else builds on that honest baseline. Without the January audit, you’re guessing — and preppers who guess tend to have three redundant flashlights and no water purification tablets.
Bottom Line
A year of monthly prep tasks is more powerful than a single weekend of panic buying. By December, a family of 4 following this calendar will have a 30-day food supply, reliable water access, tested communication plans, practiced outdoor skills, and genuine relationships with their neighbors. That’s not a bunker fantasy — that’s a resilient household that can handle almost anything the next year throws at it.
Start where you are. Do January’s audit this weekend. The rest follows.
Dan Lockland is a preparedness instructor and survival skills educator with over 15 years of hands-on experience. He shares practical, no-nonsense guidance on emergency preparedness, self-reliance, and sustainable living at PreparingWithDan.com.