
Survival cement — also called mud mortar, cob, or earthen cement — is a construction material made from subsoil, water, and a fibrous binder like straw or grass. It’s been used for thousands of years to build structures that still stand today. For preppers, knowing how to make a functional building material from dirt and water is a genuinely useful skill for post-disaster shelter repair, emergency fortification, and off-grid construction when commercial materials aren’t available.
What Survival Cement Actually Is
Survival cement isn’t Portland cement and won’t perform like it. What you’re making is a mud-based mortar that dries hard enough to build walls, seal gaps, construct simple structures, and repair damaged buildings. It works because clay particles in subsoil bond together when mixed with water and dried, creating a solid (though not waterproof) material. Adding fiber (straw, grass, hair) prevents cracking as it dries, similar to how rebar reinforces concrete.
Historically, this material goes by different names depending on the proportions and techniques:
- Cob: Clay-rich soil mixed with straw and water, formed into thick walls by hand. Entire houses built from cob have lasted centuries in the UK.
- Adobe: The same basic mixture formed into bricks, dried in the sun, then stacked with mud mortar. The standard building material across the American Southwest for hundreds of years.
- Wattle and daub: A framework of woven sticks (wattle) covered in mud plaster (daub). Common in medieval European construction.
- Rammed earth: Slightly damp earth compressed into forms. Produces the strongest earthen walls.
How to Make It
Step 1: Find the Right Soil
You need subsoil, not topsoil. Topsoil is full of organic matter (roots, humus, decomposing leaves) that rots and weakens the mixture. Dig down 8-12 inches past the dark topsoil layer until you hit lighter-colored earth — typically a mix of clay, silt, and sand.
The ideal ratio for survival cement is approximately 30% clay, 70% sand/silt. Too much clay and the mixture cracks badly as it dries. Too much sand and it crumbles — no binding strength. Here’s a simple field test: grab a handful of damp subsoil and squeeze it into a ball. If the ball holds its shape when you open your hand and doesn’t crack immediately, you have enough clay. If it won’t form a ball at all, the soil is too sandy. If it feels sticky and slippery, it’s too clay-heavy — add sand.
Step 2: Mix the Ingredients
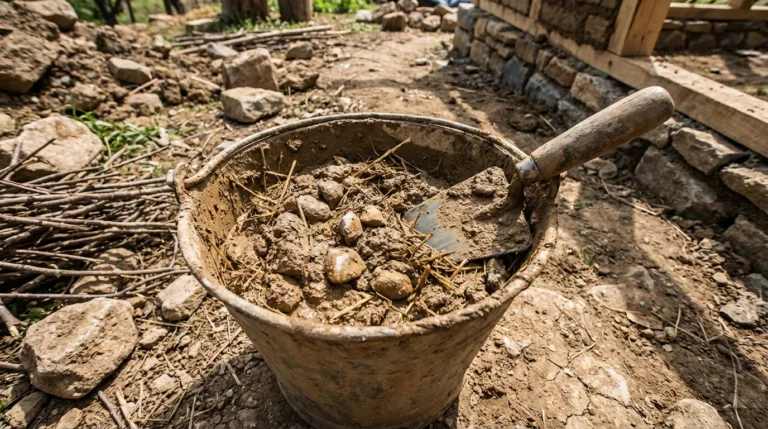
Combine your subsoil with water in a pit, wheelbarrow, or tarp. Mix thoroughly — stomping with your feet on a tarp is the traditional method and works surprisingly well. Add water gradually until the mixture reaches the consistency of thick cookie dough: moldable, holds shape, but not runny. Too wet and it slumps; too dry and it cracks.
Add fibrous binder material: straw, dried grass, pine needles, animal hair, or even shredded cloth. The fiber should be 2-6 inches long. Mix it in at roughly 10-15% by volume. The fiber reinforces the dried cement the same way rebar reinforces concrete — it distributes stress and prevents shrinkage cracks.
Step 3: Apply or Form
Depending on your application:
- For mortar (filling gaps, sealing walls): Apply directly to the surface with your hands or a trowel. Press firmly into cracks and gaps. Build up thin layers (1-2 inches at a time) and let each layer partially dry before adding the next.
- For bricks (adobe): Pack the mixture into wooden forms (a simple frame of 2x4s works — standard size is 10″×14″×4″). Smooth the top, remove the form, and let the brick sun-dry for 3-7 days, flipping once. Properly dried adobe bricks are surprisingly strong — comparable to low-grade fired brick.
- For wall construction (cob): Build up layers 12-18 inches at a time, shaping by hand. Let each layer dry enough to support weight before adding the next (24-48 hours in warm weather). Cob walls are typically 12-24 inches thick.
Step 4: Cure and Protect
Survival cement needs to dry slowly to avoid cracking. In hot, direct sun, cover with a damp cloth or tarp for the first 2-3 days to slow evaporation. Full curing takes 1-4 weeks depending on thickness and weather. Once cured, the material is hard and load-bearing but not waterproof — prolonged rain will erode it.
For weather protection, apply a lime wash (slaked lime mixed with water to a paint consistency) or plaster over the dried surface. Even a coat of clay slip (watery clay mixture) adds some water resistance. Overhanging roofs that keep rain off the walls are the most effective protection.
What You Can Build
- Emergency shelter walls: Combined with a tarp or corrugated metal roof, cob walls provide insulation and wind protection superior to a tent
- Repair damaged structures: Fill holes in walls, seal gaps around windows and doors, rebuild collapsed sections
- Outdoor oven/stove: Survival cement is excellent for building rocket stoves, outdoor bread ovens, and fire-reflector walls. The clay-sand mixture handles heat well.
- Sandbag alternative: Adobe bricks stacked to form a defensive wall or flood barrier
- Root cellar: Underground storage lined with earthen walls for food preservation
Limitations
Be realistic about what survival cement can and can’t do. It’s not waterproof without additional treatment. It’s not as strong as concrete. It can’t span gaps (no tensile strength — you need wood beams for that). And it takes days to weeks to cure, which limits its use in immediate emergencies. What it does well: provides mass, insulation, and weather protection using materials available virtually anywhere there’s dirt.
Bottom Line
Survival cement is subsoil + water + fiber, mixed to a thick consistency and formed by hand or in molds. It’s the same material humans have used to build shelter for thousands of years, and it works. In a post-disaster scenario where commercial building materials aren’t available, knowing how to mix a functional mortar from dirt, straw, and water gives you the ability to repair shelter, build walls, and construct essential structures like stoves and ovens. For more shelter-building knowledge, see our survival shelter guide.
Dan Lockland is a preparedness instructor and survival skills educator with over 15 years of hands-on experience. He shares practical, no-nonsense guidance on emergency preparedness, self-reliance, and sustainable living at PreparingWithDan.com.