
Sun-drying apples is one of the oldest food preservation methods — no dehydrator, no electricity, no special equipment. All you need is fresh apples, a knife, a flat surface, and 2-4 days of warm, dry weather. The result is a lightweight, shelf-stable snack that lasts 6-12 months in proper storage and retains most of the nutritional value of fresh fruit.
What You Need
- Fresh apples (any variety — Granny Smith, Fuji, and Gala work well; tart varieties dry best)
- A sharp knife or mandoline slicer
- Lemon juice or citric acid solution (1 tablespoon lemon juice per cup of water)
- Drying racks, clean window screens, or baking sheets lined with parchment paper
- Cheesecloth or fine mesh netting (to keep insects off)
- 2-4 consecutive days of warm (85°F+), low-humidity weather with good airflow
Step-by-Step Process
1. Prepare the Apples
Wash the apples thoroughly. You can peel them or leave the skin on — peeled apples dry faster and have a smoother texture, but unpeeled apples retain more fiber and nutrients. Core the apples and slice them into uniform rings or slices, about 1/4 inch thick. Consistency matters: uneven slices dry at different rates, leaving some pieces overdone while others are still moist (and prone to mold).
2. Pre-Treat to Prevent Browning
Soak the slices in a lemon juice solution (1 tablespoon lemon juice per cup of water) for 10 minutes. This prevents oxidation (browning) and adds a mild tartness. Alternatively, you can use a citric acid dip (1 teaspoon citric acid per quart of water) or a salt water dip (1/2 teaspoon salt per quart). The ascorbic acid in lemon juice also helps preserve vitamin C content during drying.
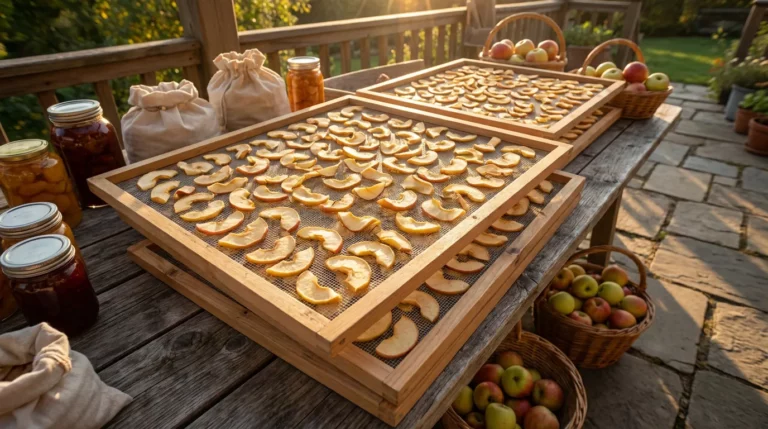
3. Arrange for Drying
Lay the slices in a single layer on your drying surface. Don’t overlap — every slice needs direct airflow on both sides. The ideal drying setup is a wooden frame with a mesh screen (hardware cloth or food-grade mesh), elevated on blocks or sawhorses for air circulation underneath. A clean window screen on blocks works perfectly. If you’re using a baking sheet, elevate it and flip the slices twice daily.
4. Place in Direct Sun
Position your drying racks in direct sunlight, ideally on a south-facing surface. The minimum effective temperature for sun-drying is about 85°F (30°C), with relative humidity below 60%. Higher temperatures (95-100°F) dry faster. Cover the slices with a single layer of cheesecloth to keep flies and insects off while still allowing airflow and sunlight.
5. Manage the Process
Bring the racks indoors overnight — dew and cool nighttime temperatures add moisture back. Flip the slices once or twice per day for even drying. In optimal conditions (95°F+, low humidity, good breeze), apples dry in 2-3 days. In marginal conditions (85-90°F, moderate humidity), expect 3-5 days. The slices are done when they feel leathery and pliable — not crispy, not sticky. Bend a slice: it should bend without snapping, and no moisture should appear at the crease.
Storage
Condition the dried apples before long-term storage: pack them loosely in a glass jar for 7-10 days, shaking daily. If any moisture condenses inside the jar, the apples need more drying time. Once conditioned, store in airtight containers (mason jars, vacuum-sealed bags, or Mylar bags with oxygen absorbers) in a cool, dark location.
- Room temperature, airtight: 6-12 months
- With oxygen absorbers in Mylar: 1-2 years
- Vacuum-sealed and frozen: 2+ years
Alternative: Oven Drying
If the weather won’t cooperate, you can oven-dry apples at the lowest setting (170°F or less) with the door propped open slightly for airflow. Arrange slices on parchment-lined baking sheets. This takes 6-10 hours but gives you consistent results regardless of weather. The trade-off: higher energy cost and you can’t use the oven for anything else during the process.
Why This Matters for Preppers
Sun-drying requires zero electricity and zero specialized equipment. In a long-term grid-down scenario, knowing how to preserve seasonal fruit extends your food supply through winter months when fresh food isn’t available. Dried apples provide about 240 calories per cup (compared to about 65 calories for fresh apple slices) and retain vitamins A and C, potassium, and fiber. They’re also lightweight for go-bags and pleasant to eat without preparation — important for morale during extended emergencies.
For more food preservation techniques, see our complete food preservation guide and our prepper pantry guide.
Troubleshooting Common Problems
- Apples turned brown despite pre-treatment: The lemon juice soak wasn’t long enough (need full 10 minutes) or the solution was too diluted. Some browning is cosmetic only and doesn’t affect taste or safety. For maximum brightness, use ascorbic acid powder (vitamin C) instead of lemon juice — 1 teaspoon per quart of water.
- Some slices are crispy while others are still soft: Uneven slice thickness. Use a mandoline slicer for consistent 1/4-inch slices. If some are done before others, remove the finished ones and continue drying the rest.
- Mold appeared during drying: Humidity was too high or the slices weren’t getting enough airflow. Sun-drying only works reliably when humidity is below 60%. If weather turns humid mid-process, move the slices indoors and finish in an oven at 170°F. Discard any slices with visible mold.
- Slices stuck to the drying surface: Use parchment paper, a silicone mat, or a lightly oiled mesh screen. Flip the slices every 8-12 hours to prevent sticking.
Best Apple Varieties for Drying
Not all apples dry equally well. The best choices balance sweetness, tartness, and firm texture:
- Granny Smith: Tart, firm, holds shape well during drying. The tartness intensifies when dehydrated — excellent for snacking.
- Fuji: Sweet and crisp. Produces the sweetest dried apple slices without added sugar.
- Gala: Mild and sweet. Good all-around choice, slightly softer texture when dried.
- Honeycrisp: Sweet-tart balance. Premium choice if budget allows — produces the most flavorful dried apples.
- Avoid: Red Delicious (too soft, mealy texture when dried) and McIntosh (breaks down too much).
Using Dried Apples in Cooking
Beyond snacking, dried apples are versatile in emergency cooking. Rehydrate by soaking in warm water for 30-60 minutes, then use in oatmeal, pancake batter, or stewed with cinnamon and sugar as a dessert. They can substitute for fresh apples in most recipes — use about 1/3 the volume of dried apples compared to fresh (they rehydrate to roughly 3x their dried volume). In a prepper pantry, dried apples add vitamin C, fiber, and a welcome variety to an otherwise monotonous diet of rice and beans.
Dan Lockland is a preparedness instructor and survival skills educator with over 15 years of hands-on experience. He shares practical, no-nonsense guidance on emergency preparedness, self-reliance, and sustainable living at PreparingWithDan.com.