
Solar power is a clean and renewable energy source that can be harnessed to power homes. This beginner’s guide will provide step-by-step instructions on how to set up a solar power system for your home. We will cover everything from understanding the parts of a solar energy system to calculating your power load and choosing the right solar panels. By following this guide, you can unlock the power of the sun and start saving money on your energy bills.
Key Takeaways:
- Learn how to set up your own solar power system with this beginner’s guide.
- Understand the different parts of a solar energy system.
- Calculate your power load to determine the size of your solar power system.
- Choose the right solar panels for your system based on efficiency and durability.
- Consider the mounting options and location for your solar array.
Step 1: Parts of a Home Solar Energy System
Before diving into the installation process, it’s important to understand the different parts of a home solar energy system. This includes solar panels (also known as PV panels), power inverters, PV disconnects, the home’s breaker box, and the net meter. These components work together to convert solar energy into usable electricity for your home. By familiarizing yourself with these parts, you’ll have a better understanding of how your system functions.
Let’s take a closer look at each component:
- Solar panels: These are the heart of the system and are responsible for capturing sunlight and converting it into electricity. They are made up of photovoltaic cells that generate DC electricity when exposed to sunlight.
- Power inverters: Once the solar panels generate DC electricity, power inverters convert it into AC electricity, which is the standard form used in homes and appliances. Grid-tied systems use string inverters or microinverters, while off-grid systems use off-grid inverters.
- PV disconnects: These are safety devices that allow you to disconnect the solar panels from the system for maintenance or in case of emergencies.
- Breaker box: The breaker box, also known as the electrical panel, is responsible for distributing electricity throughout your home. It connects the solar energy system to the main electrical supply and ensures a seamless integration.
- Net meter: The net meter measures the energy produced by your solar panels and the energy consumed by your home. It keeps track of the net energy flow, allowing you to earn credits for excess energy produced and fed back into the grid.
Understanding the purpose and functionality of each part will empower you to make informed decisions during the installation and maintenance of your home solar energy system.
Now that you have a clear understanding of the different components, you’re ready to move on to the next step: load calculation. By determining your power load, you’ll be able to accurately size your solar panel system to meet your energy needs.
Step 2: Load Calculation
To determine the size of your solar power system, you’ll need to calculate your power load. This involves analyzing your utility bills to determine your average energy consumption and considering the peak sun hours in your area. By performing this load calculation, you can determine how many solar panels you’ll need to meet your energy needs and how much space they will require. This step is crucial for planning the size and layout of your solar array.
Calculating your power load is an essential step in designing an efficient solar power system. It helps you understand your energy consumption patterns and ensures that your solar panels can generate enough electricity to meet your needs. Let’s break down the process:
- Analyze your utility bills: Take a look at your past utility bills to determine your average monthly and annual energy consumption. Look for patterns and note any significant fluctuations.
- Consider peak sun hours: Research the peak sun hours in your geographical location. Peak sun hours refer to the number of hours in a day when the sunlight is most intense and optimal for solar power generation.
- Calculate average daily energy consumption: Divide your average monthly energy consumption by the number of days in the month to get your average daily energy consumption.
- Factor in system efficiency: Solar panels have an efficiency rating that determines how effectively they can convert sunlight into electricity. Multiply your average daily energy consumption by the system efficiency to estimate the energy your solar panels would need to generate.
- Determine required solar panel capacity: Divide the estimated energy generation by the peak sun hours to calculate the required capacity of your solar panels in kilowatts (kW).
Once you have determined the required capacity of your solar panels, you can start considering the physical space they will require. Solar panel sizing is crucial in ensuring that you have enough roof or ground space to accommodate the necessary number of panels. It’s important to find a balance between your energy needs and available space.
By performing a thorough load calculation, you can confidently proceed to the next step of selecting the right solar panels for your system and proceed with the installation process. Get ready to harness the power of the sun and take control of your energy consumption!
Now that you understand how to calculate your power load, let’s delve into the process of choosing the right solar panels for your DIY solar power system.
Step 3: Choosing Panels
When it comes to selecting the right solar panels for your system, you have two primary options: crystalline panels and thin-film panels. Each type has its own advantages and disadvantages, and by understanding these, you can make an informed decision that suits your specific needs.
Crystalline Panels:
Known for their efficiency and durability, crystalline panels are the most commonly used solar panels in residential installations. They are made from silicon crystals that convert sunlight into electricity. Crystalline panels can be either monocrystalline or polycrystalline, with the former being more efficient but also pricier. These panels are ideal for those looking for high energy production and a long lifespan.
Thin-Film Panels:
On the other hand, thin-film panels offer flexibility and ease of installation. Made by depositing a thin layer of semiconductor material onto a substrate, these panels are more lightweight and less rigid compared to crystalline panels. Thin-film panels are suitable for curved or irregular surfaces and have a lower cost per watt. However, they are less efficient and require more space to generate the same amount of power as crystalline panels.
When choosing between crystalline and thin-film panels, consider the following factors:
- Cost: Crystalline panels are typically more expensive but have a higher efficiency and longer lifespan. Thin-film panels have a lower cost but require more space for installation.
- Efficiency: Crystalline panels offer higher efficiency, meaning they can produce more electricity in the same amount of sunlight compared to thin-film panels.
- Durability: Crystalline panels are known for their durability and long lifespan, while thin-film panels are more susceptible to degradation over time.
| Crystalline Panels | Thin-Film Panels | |
|---|---|---|
| Cost | Higher | Lower |
| Efficiency | Higher | Lower |
| Durability | High | Lower |
By carefully considering these factors, you can make an informed choice that aligns with your budget, energy requirements, and long-term goals. Remember, the right choice of solar panel is crucial in ensuring the effectiveness and efficiency of your solar power system.
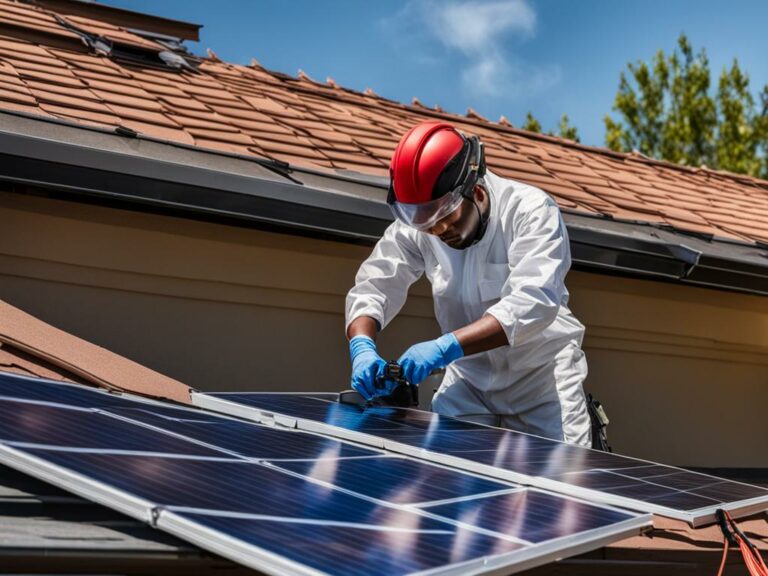
Step 4: Solar Panel Racking and Location Considerations
Once you’ve chosen your panels, it’s time to consider the mounting options and location for your solar array. The proper mounting of solar panels is crucial for their optimal performance and longevity. This section will provide insights into solar panel mounting techniques and considerations for both roof and ground installations.
Rooftop Panel Mounting
Roof mounting is a popular choice as it saves space and is aesthetically pleasing. Before proceeding with rooftop panel installation, it’s important to assess the suitability of your roof.
- Structural Soundness: Ensure that your roof is structurally sound and can withstand the weight of the solar panels. An inspection by a professional might be necessary to assess the roof’s capacity.
- Sunlight Accessibility: Check that your roof receives ample sunlight throughout the day. Shaded areas and obstructions, such as chimneys or neighboring buildings, can impact solar panel efficiency.
Roof mounting typically involves using specialized racks and brackets to securely attach the panels to your roof. Depending on the type of roof and solar panel, different mounting methods may be required. It is recommended to consult with a professional or follow the manufacturer’s guidelines for proper installation.
Ground Panel Installation
If your roof is not suitable for solar panel installation or if you have ample space in your yard, ground installation is an alternative option. Ground-mounted solar panels offer flexibility in terms of positioning and can be easily adjusted for optimal sun exposure.
Prior to ground installation, consider the following:
- Available Space: Determine the available space and calculate how many solar panels can be accommodated.
- Sunlight Exposure: Ensure that the chosen location receives sufficient sunlight throughout the day, without being obstructed by trees, buildings, or other shading elements.
Ground installation typically involves using specialized racking systems to securely mount the solar panels on a metal frame above the ground. The panels can be tilted and positioned for maximum sun exposure.
Remember to check with your local authorities and adhere to any building codes or permits required for solar panel installation.
Comparison of Rooftop and Ground Mounting
| Considerations | Rooftop Mounting | Ground Installation |
|---|---|---|
| Space Efficiency | Can save space by utilizing available roof area | Requires larger space availability in the yard |
| Aesthetics | Blends with the roof, visually appealing | Potentially more visible, but can be positioned strategically for minimal impact |
| Accessibility | May require additional precautions and equipment for rooftop access | Easy access for maintenance and cleaning |
| Installation Complexity | May involve challenges such as roof slope, orientation, or obstructions | Relatively simpler installation process |
Both rooftop and ground-mounted installations have their advantages and considerations. It’s important to choose the option that best suits your available space, sunlight accessibility, and aesthetic preferences. Consulting with professionals can help ensure a successful installation.
Step 5: Solar Inverters
Solar inverters play a crucial role in your solar power system. They are responsible for converting the direct current (DC) generated by the solar panels into usable alternating current (AC) electricity that can power your home. Without inverters, the electricity generated by your solar panels would be unusable.
There are different types of solar inverters available, but two of the most common ones are grid-tie inverters and micro inverters. Let’s take a closer look at each:
Grid-Tie Inverters
Grid-tie inverters are the most commonly used inverters in solar power systems. They are designed to synchronize with the electrical grid, allowing excess electricity generated by your solar panels to be fed back into the grid. This process is known as net metering, and it allows you to earn credits or receive payment for the surplus energy you produce. Grid-tie inverters are reliable, cost-effective, and suitable for most residential installations.
Micro Inverters
Micro inverters, on the other hand, offer individual optimization for each solar panel in your system. Unlike grid-tie inverters, micro inverters are installed on each panel, converting the DC power directly to AC power at the panel level. This enables better performance monitoring and increases overall system efficiency, especially in situations where shading or panel mismatch can occur. Micro inverters are a great option if you have a complex or shaded roof, as they maximize the output of each individual panel.
Deciding which type of inverter is right for your solar power system depends on various factors, including your budget, system size, and specific requirements. It’s important to consult with a professional solar installer or an expert to assess your needs and help you choose the most suitable inverter for your system.
| Grid-Tie Inverters | Micro Inverters |
|---|---|
| Syncs with the electrical grid | Provides individual optimization for each panel |
| Allows net metering | Mitigates shading and panel mismatch issues |
| Cost-effective and reliable | Increases overall system efficiency |
Choosing the right solar inverter is crucial for optimizing the performance and efficiency of your solar power system. Consider your specific needs and consult with professionals to ensure you make an informed decision. Now that you have a better understanding of solar inverters, let’s move on to step 6: The Net Meter and Battery Backups.
Step 6: The Net Meter and Battery Backups
In order to maximize the efficiency and reliability of your solar power system, it is important to understand the role of net metering and battery backups.
Net metering allows you to take advantage of the excess power generated by your solar panels. When your panels produce more electricity than you need, the excess energy is sent back to the grid, effectively spinning your electric meter backward. This means that you can offset the costs of your electricity usage when your solar panels aren’t generating as much power, such as during the night or on cloudy days. Net metering is an essential component of a grid-tied solar power system and can result in significant cost savings over time.
However, relying solely on the grid can leave you without power during outages. This is where battery backups come in. By incorporating battery storage into your solar power system, you can store excess energy generated by your panels and use it during times when solar power is not available, ensuring that your home has a reliable source of electricity even when the grid goes down. Battery backups provide peace of mind and allow you to fully harness the benefits of solar power storage.
| Net Metering | Battery Backups |
|---|---|
| Allows you to sell excess power back to the grid | Provides energy storage for use during outages or when solar power is not available |
| Offsets the costs of electricity usage | Ensures a reliable source of electricity during grid outages |
| Maximizes the efficiency of your solar power system | Provides peace of mind and energy independence |
By leveraging net metering and incorporating battery backups into your solar power system, you can optimize your energy usage, reduce electricity costs, and ensure that your home remains powered even during unexpected outages. Now that you understand the importance of these components, you can confidently move forward with your solar power journey.
Next, we will explore step 7: installing and wiring the system, where we will provide a detailed guide on bringing everything together and bringing your solar power system to life.
Step 7: Installing and Wiring the System
With all the components in place, it’s time to install and wire your solar power system. Follow these step-by-step instructions to ensure a successful installation process.
1. Installing the Solar Panels
Begin by positioning the solar panels in a location that receives maximum sunlight. If you’re mounting them on the roof, secure the panels using the appropriate mounting brackets or rails. Ensure that the panels are angled correctly to optimize their exposure to sunlight.
2. Connecting the Panels to the Battery
Once the panels are securely in place, it’s time to connect them to the battery. Carefully follow the manufacturer’s instructions for wiring the panels in series or parallel, depending on your system design. Take note of the polarity to avoid any wiring mishaps.
3. Setting Up the Inverter
The next step is to connect the solar panels to the inverter. Consult the inverter’s user manual for specific instructions on wiring and configuration. Ensure that the inverter is properly grounded and connected to the battery and panels to complete the circuit.
4. Establishing the Electrical Connections
Now that the panels and inverter are connected, it’s crucial to establish the necessary electrical connections. This includes wiring the solar power system to your home’s electrical panel and the main utility grid. It is highly recommended to hire a licensed electrician for this step to ensure compliance with local electrical codes and regulations.
5. Safety Precautions
Throughout the installation process, it’s essential to prioritize safety. Wear protective gear, such as gloves and safety glasses, when handling electrical components. Ensure that the system is properly grounded to prevent electrical hazards. Always follow the manufacturer’s instructions and consult a professional if you’re unsure about any aspect of the installation.
Remember, working with electricity can be dangerous. If you are uncertain about any step of the installation process, it’s always best to seek professional help.
By following these steps and adhering to safety guidelines, you can successfully install and wire your solar power system. Once completed, your system will be ready to harness the sun’s energy, providing clean and renewable power for your home.
Troubleshooting Common Issues
Even with a well-installed solar power system, issues may arise. It’s essential to address these problems promptly to ensure your solar system operates efficiently. This section provides troubleshooting tips and maintenance recommendations to help you identify and resolve common issues on your own, without the need for professional assistance.
1. Panel Inefficiencies: If you notice a decrease in your solar system’s performance, it could be due to panel inefficiencies. Here are some steps you can take to troubleshoot:
- Check for any shading on the panels. Overgrown trees, nearby buildings, or debris can obstruct sunlight and reduce panel efficiency.
- Inspect the panels for any physical damage or defects. Cracks, broken glass, or loose wiring could impact their performance.
- Ensure the panels are clean and free from dirt, dust, or debris. Regular cleaning with mild soap and water can help maintain optimal performance.
2. Wiring Faults: Faulty wiring can lead to power issues within your solar system. Follow these steps to troubleshoot wiring faults:
- Inspect the wiring connections between the panels, inverters, and battery backup (if applicable). Ensure all connections are secure and free from damage.
- Check for any loose or corroded wiring connections. Tighten loose connections and clean corroded ones to restore proper functionality.
- If you suspect a wiring fault but are unsure of the exact location, consult a professional electrician to perform a thorough inspection.
Remember, safety is paramount when troubleshooting your solar system. Always follow appropriate safety precautions and consult a professional if you are unsure or uncomfortable handling any electrical components.
“Regular maintenance and periodic inspections are key to ensuring your solar system operates at peak performance. By following these troubleshooting tips, you can address common issues and keep your solar power system running smoothly.”
Additionally, to minimize the risk of issues and maximize the lifespan of your solar system, consider the following maintenance tips:
- Monitor your solar system’s performance regularly. Keep track of energy production to identify any significant drops or inconsistencies.
- Keep the area around your solar panels clear of debris or obstructions that may affect their efficiency.
- Check for signs of wear or damage, such as loose wires, cracks in panels, or corrosion on connections. Address these issues promptly to prevent further damage.
- Consider scheduling professional maintenance annually to ensure all components are functioning optimally.
By implementing these troubleshooting tips and maintenance practices, you can resolve common issues and ensure the long-term performance of your solar power system.
Cost Considerations and Government Programs
While there are costs associated with installing a solar power system, the good news is that there are various government programs and incentives available to help offset these expenses. By taking advantage of these opportunities, you can make solar power more affordable and financially viable.
One of the key cost considerations when it comes to DIY solar power is the upfront investment. You’ll need to purchase solar panels, inverters, and other equipment necessary for your system. Additionally, there may be installation costs if you choose to hire professionals or costs associated with obtaining any necessary permits.
However, it’s essential to look beyond the initial investment and consider the long-term savings and return on investment. Solar power can significantly reduce your electricity bills, and the savings you accumulate over time can outweigh the initial costs.
Moreover, government programs and incentives can further lower the cost of installing a solar power system. These programs can include rebates, tax credits, and grants that can help cover a portion of the expenses. It’s worth researching the available options in your area and taking advantage of these opportunities to make your solar power project more affordable.
Here is an overview of some government programs and incentives that aim to promote solar power:
1. Federal Tax Credit
The Federal Investment Tax Credit (ITC) offers a significant benefit for homeowners who install solar power systems. The ITC allows you to deduct a percentage of the system’s cost from your federal taxes. Currently, the ITC provides a 26% credit for residential solar installations. However, please note that tax credits are subject to change, and it’s advisable to consult with a tax professional for the most up-to-date information.
2. State and Local Rebates
Many states and local governments offer additional rebates or incentives to encourage homeowners to invest in solar power. These programs can provide direct cash incentives or offer rebates based on the size and performance of your system. Check with your state and local authorities to see what incentives are available in your area.
3. Net Metering
Net metering is another program that can help offset solar power costs. With net metering, any excess electricity generated by your system can be fed back into the grid, and you receive credit for it. This means that during periods when your system produces more electricity than you need, you can offset the cost of electricity you consume when solar power is not available, such as during the night or on cloudy days.
4. Solar Renewable Energy Certificates (SRECs)
In some states, you can earn Solar Renewable Energy Certificates (SRECs) when your solar power system produces electricity. These certificates can be sold to utilities or other entities that need to meet renewable energy requirements. The income generated from selling SRECs can help offset the initial installation costs and even provide an ongoing revenue stream.
By taking advantage of these cost-saving opportunities, you can make installing a solar power system more affordable. Not only will you reduce your reliance on traditional energy sources, but you can also contribute to a cleaner and more sustainable future.
| Program | Description |
|---|---|
| Federal Tax Credit | Deduct a percentage of the system’s cost from federal taxes |
| State and Local Rebates | Direct cash incentives or rebates based on system size and performance |
| Net Metering | Receive credit for excess electricity fed back into the grid |
| Solar Renewable Energy Certificates (SRECs) | Earn certificates that can be sold to utilities or entities |
With these government programs and incentives, the cost of installing a solar power system becomes more manageable. Remember to do thorough research on available programs in your area and consult with professionals to maximize the benefits and potential savings.
Next, we’ll provide you with further resources and DIY options to expand your knowledge and explore alternative ways to harness solar power.
Further Resources and DIY Options
If you’re eager to dive deeper into the world of solar power, there are plenty of additional resources and recommended readings to explore. Whether you’re interested in learning more about the technical aspects of solar energy or looking for guides on building your own solar panels, these resources will help you expand your knowledge and take your DIY solar power journey to the next level.
For those who want to further their understanding of solar power systems and renewable energy, the following readings are highly recommended:
- Photovoltaic Systems Engineering by Roger A. Messenger and Jerry Ventre
- Solar Electricity Handbook by Michael Boxwell
- The Solar House: Passive Heating and Cooling by Daniel D. Chiras
- Solar Power Your Home For Dummies by Rik DeGunther
In addition to these books, there are numerous websites that offer valuable information and resources. Here are a few reputable websites where you can find comprehensive DIY solar panel guides and purchase solar panels:
- Solar Panel Guides – This website provides step-by-step instructions, video tutorials, and helpful tips for building your own solar panels. Visit their website: https://solarpanelguides.com.
- Solar Wholesale – Known for their extensive selection of high-quality solar panels, Solar Wholesale offers a wide range of options for both residential and commercial applications. Explore their products: https://solarwholesale.com.
- Renogy – Renogy is a trusted brand for solar panels, inverters, and other solar power system components. Their website provides comprehensive guides and resources for DIY solar projects. Discover Renogy’s products and resources: https://renogy.com.
Remember, DIY solar panel construction requires careful planning, proper tools, and knowledge of electrical wiring. Make sure to follow safety guidelines and local regulations when embarking on any DIY solar project.
Testimonies from Successful DIY Solar Panel Builders:
“Building my own solar panels was a rewarding experience. Not only did I save money, but I also gained a deeper understanding of solar energy. The guides and resources I found online were invaluable in my DIY journey.” – Emily, California
“I was initially hesitant about building my own solar panels, but the online resources I discovered made the process clear and straightforward. It’s empowering to generate clean energy for my home and reduce my carbon footprint.” – David, Texas
By utilizing the recommended resources and learning from the experiences of others, you can confidently embark on your DIY solar power project and make a meaningful impact in your own life and the environment.
Solar Power Conclusion
In conclusion, harnessing solar power through a DIY approach is a viable and rewarding endeavor. By following this step-by-step guide, you can unlock the potential of solar energy and transform your home into a clean and sustainable power source.
The benefits of solar power DIY are numerous. First and foremost, it offers significant cost savings. By generating your own electricity, you can reduce or even eliminate your monthly energy bills. Over time, the savings can add up to thousands of dollars, allowing you to allocate your hard-earned money towards other important aspects of your life.
Moreover, DIY solar power helps in reducing your environmental impact. Traditional energy sources rely heavily on fossil fuels, which contribute to air pollution and greenhouse gas emissions. By switching to solar power, you are reducing your carbon footprint and helping to mitigate climate change.
Finally, DIY solar power grants you energy independence. With your own solar power system, you are no longer at the mercy of fluctuating energy prices or power outages. You have full control over your energy production and can enjoy uninterrupted electricity, even during grid failures.
Now is the perfect time to start your solar power journey and make a positive change for yourself and the planet. Embrace the benefits of solar power DIY and take a step towards a greener and more sustainable future.
Source Links
- https://www.instructables.com/DIY-Home-Solar-Planning-a-Solar-Array-Beginners/
- https://www.getyourfaceinabook.com/book/9798742474111
- https://www.ecoideaz.com/expert-corner/step-by-step-guide-on-how-to-set-up-solar-power-at-home