
Preserving the Harvest: A Comprehensive Guide to Timeless Food Preservation Techniques
1. Introduction to food preservation
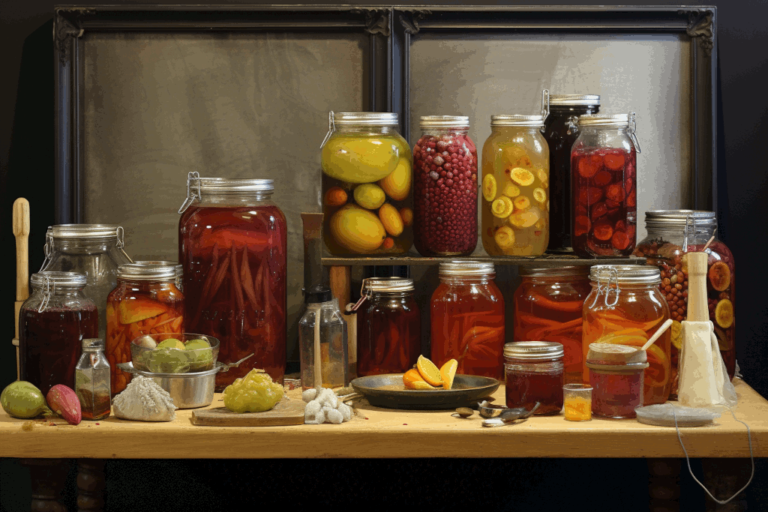
Preserving the harvest is a time-honored practice that enables us to enjoy the flavors of seasonal produce throughout the year. Whether you have a bountiful garden or simply want to take advantage of the abundance of fresh produce at the local market, learning food preservation techniques allows you to savor the goodness of fruits, vegetables, and other perishable items long after their peak season.
Food preservation is more than just a way to extend the shelf life of your favorite fruits and vegetables. It is a means of capturing the essence of nature’s bounty, preserving its nutritional value, and unlocking a world of culinary possibilities. Moreover, it plays a pivotal role in promoting sustainability by reducing food waste and offers economic benefits by allowing us to save on out-of-season or imported goods.
By harnessing various techniques, from traditional methods like canning and fermenting to modern approaches like freezing and dehydrating, you can store and enjoy the vibrant colors, flavors, and nutrients of the harvest for months to come.
In this comprehensive guide, we will delve deep into the art and science of food preservation. We’ll provide you with step-by-step instructions, helpful tips, and expert advice. Whether you’re a beginner looking to make your first jar of jam or a seasoned preserver aiming to perfect your pickling technique, this guide has something for everyone.
Join us on this culinary adventure as we explore the rich history, diverse techniques, and endless possibilities of preserving the harvest. Embrace the joys of homemade preserves, dried fruits, fermented delights, and more as we journey through the fascinating world of food preservation.
2. The importance of preserving the harvest
Preserving the harvest is more than a time-honored tradition passed down through generations; it’s an indispensable skill that lets us relish nature’s bounty throughout the year. The act of preservation serves multiple purposes, from reducing food waste to ensuring year-round access to fresh, nutritious produce.
In our modern, fast-paced society, where convenience often overshadows tradition, the art of food preservation has taken a back seat. Yet, it’s imperative for us to rekindle our relationship with these age-old techniques, given their myriad benefits. For starters, preserving allows us to sidestep the store-bought, processed foods laden with additives, letting us indulge in the genuine taste and nutrition of homegrown produce instead.
Furthermore, by preserving seasonal produce, we champion local farmers and make a conscious effort to reduce our carbon footprint. This practice curtails the demand for out-of-season produce, which often requires energy-intensive transportation. There’s also an empowering sense of self-sufficiency in knowing we have a pantry full of preserved goods to fall back on during lean times or emergencies.
Beyond the tangible benefits, food preservation is a bridge to our past. These methods, handed down by our forebears, are imbued with stories and the cultural essence of our communities. Engaging in this practice allows us to honor ancestral wisdom, forging a tangible link between past and present generations.
3. Various methods of food preservation
There are various methods of food preservation that have been perfected over generations, each with its own unique benefits and considerations.
One of the most popular methods is canning, which involves sealing food in jars and heating them to destroy any microorganisms that could cause spoilage. This method is ideal for preserving fruits, vegetables, jams, and sauces, as well as soups and stews. Canned foods can last for years, making them a convenient and reliable option for long-term preservation.
Another widely used method is freezing. Freezing helps to maintain the flavor, texture, and nutritional value of foods. It is particularly suitable for fruits, vegetables, meat, and seafood. By freezing foods at their peak freshness, you can enjoy them throughout the year, even when they are out of season.
Drying is another effective method of food preservation. This technique involves removing the moisture from food, inhibiting the growth of bacteria and fungi. Dried foods can be stored for extended periods without refrigeration, making them perfect for camping trips, backpacking, or snacks on the go. Fruits, vegetables, herbs, and even meat can be successfully dried and enjoyed later.
Fermentation is a traditional method that not only preserves food but also enhances its flavor and nutritional value. Through the process of fermentation, microorganisms convert sugars into acids, alcohol, and gases, creating a unique taste profile. Fermented foods like sauerkraut, kimchi, pickles, and yogurt are not only delicious but also provide beneficial probiotics for gut health.
Additionally, there are other lesser-known preservation methods such as smoking, brining, and pickling. Smoking imparts a distinct smoky flavor to meats, fish, and cheeses while also acting as a natural preservative. Brining involves soaking food in a saltwater solution, which helps to extend its shelf life and enhance its flavor. Pickling, on the other hand, uses acidic solutions like vinegar to preserve fruits and vegetables while adding a tangy and flavorful twist.
Whether you prefer the convenience of canned foods, the freshness of frozen produce, the portability of dried snacks, or the unique flavors of fermented delights, there is a preservation method to suit every taste. Let’s explore more in detail the most relevant methods.
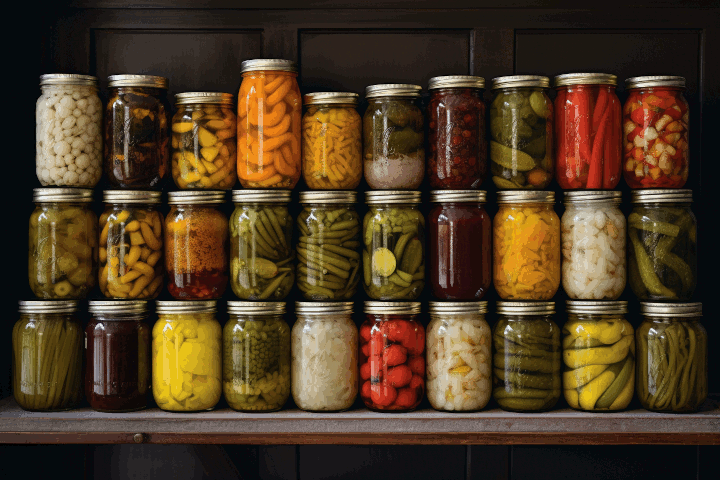
a. Canning
Canning, a revered food preservation technique, has stood the test of time, enabling generations to relish the essence of freshly harvested produce well beyond its season. This method involves sealing food in jars or cans and then applying heat, which eradicates spoilage-causing agents like bacteria, yeast, and molds.
One of canning’s standout attributes is its adaptability. From a diverse array of fruits and vegetables to meats, canning is a reliable means to prolong the enjoyment of your cherished foods. Whether you’re preserving the bounty of your own garden or the seasonal offerings from local farmers’ markets, canning ensures longevity without compromising quality.
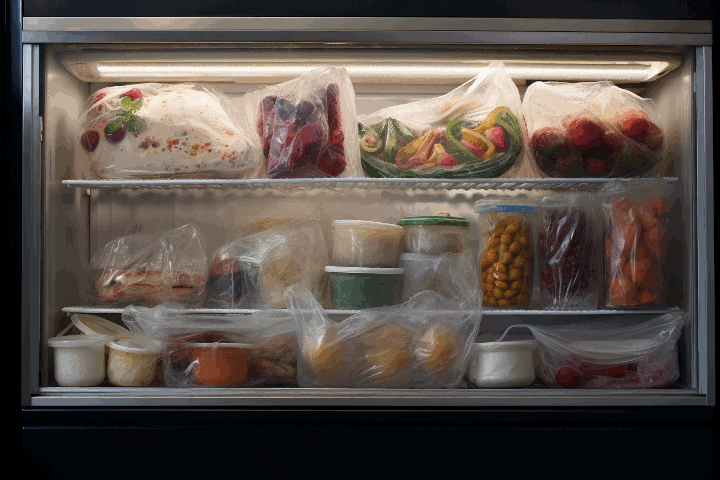
b. Freezing
Freezing stands out as a favored and potent method of food preservation, adeptly prolonging the life of your harvest while safeguarding its flavors and nutrients. Whether you’re blessed with a bountiful garden or you’re keen on hoarding seasonal treasures from the local farmers’ market, freezing offers a stellar avenue to encapsulate the harvest’s essence for year-round enjoyment.
The cornerstone of successful freezing is quality. Initiating the process with produce at its zenith of ripeness ensures the frozen result retains optimal flavor and texture. Opt for fruits and vegetables that exude firmness, ripeness, and are devoid of blemishes or spoilage indicators.
Promptness in freezing post-harvest or purchase is paramount, as it directly influences quality. A swift freeze at frigid temperatures—around 0°F (-18°C)—is the gold standard for preserving the integrity of your food.
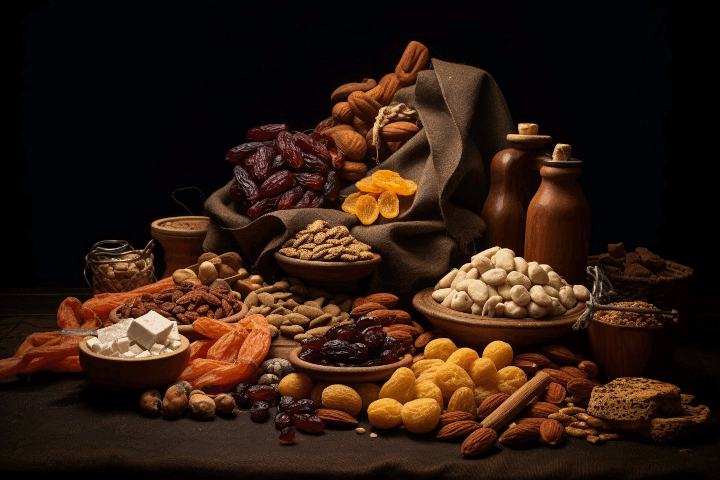
c. Drying
Drying stands as one of humanity’s most ancient and revered food preservation methods. By methodically extracting moisture, drying thwarts bacteria, yeast, and molds, the usual culprits of spoilage. This not only amplifies the shelf life of diverse foods—from fruits and vegetables to meats and herbs—but also intensifies their flavors, offering a richer gastronomic experience.
Several drying techniques exist, each boasting its distinct advantages:
- Air Drying: This method capitalizes on natural ventilation in low-humidity environments. Foods, especially herbs and certain fruits like apples and pears, are left to dry naturally over time.
- Sun Drying: Harnessing the sun’s radiant energy, this age-old technique has been a staple in various cultures. Fruits like grapes, figs, and tomatoes metamorphose into delectable, chewy delights under the sun’s embrace. However, it’s paramount to account for weather vagaries, as undue humidity or rain can disrupt the drying trajectory.
- Electric Dehydrators: For those seeking precision, electric dehydrators present a modern solution. These devices, with their adjustable temperature and timing controls, ensure uniform drying. Their versatility encompasses a broad spectrum, from vegetables and fruits to jerky and fruit leather.
d. Fermentation
At its core, fermentation transforms food sugars into alcohol, acids, or gases, orchestrated by microorganisms like bacteria and yeast. Beyond mere preservation, fermentation bestows foods with intricate, layered flavors and a host of health benefits.
Consider the ubiquitous sauerkraut: a symphony of tang and crunch birthed from fermenting shredded cabbage with salt. The cabbage’s inherent beneficial bacteria kickstart the fermentation, producing lactic acid—a natural preservative. The outcome? A probiotic powerhouse that not only endures but also fortifies health.
e. Pickling
This age-old technique does more than just prolong the life of fruits and vegetables—it transforms them, imbuing them with a zesty tang that elevates their taste and texture.
At the heart of pickling lies the principle of submerging foods in a brine or vinegar solution. This acidic bath not only wards off spoilage-causing bacteria but also imparts the signature tang that pickling aficionados cherish.
4. Choosing the right preservation method for different foods
We have discussed so far different preservation methods and choosing the right one is crucial to maintain the quality, flavor, and nutritional value of foods. Here’s a quick reference guide to help you make the best match:
- Canning: Ideal for high-acidity foods. Examples: tomatoes, citrus fruits, jams.
- Freezing: Suitable for a broad range of items. Examples: berries, green beans, meats.
- Drying or Dehydrating: Best for items where moisture removal is key. Examples: herbs, apricots, jerky.
- Fermentation: For foods that benefit from microbial transformation. Examples: cabbage (sauerkraut), cucumbers (pickles).
- Salt Curing or Brining: Perfect for preserving and flavoring meats and fish. Examples: salmon, ham.
Factors to consider:
- Equipment Availability: Do you have a canner, dehydrator, or deep freezer?
- Storage Space: Fermented foods might need room temperature storage, while frozen goods require freezer space.
- Intended Use: Dried fruits might be for snacking, while canned tomatoes could be for sauces.
- Taste Preference: Some prefer the tang of fermented pickles over vinegar-based ones.
Remember, the best method often depends on the specific food, your available resources, and personal preferences. By understanding the strengths of each method and more importantly testing them, you can make informed decisions.
To help, we will provide in the next section a step-by-step guide, but before, let’s first see how to prepare the produce as it’s a critical step whatever mehtod you choose.
Preparing the produce
This step is essential to ensure the preservation process goes smoothly and the end result is of the highest quality. Here are some key tips:
1. Harvest at the Right Time: Timing is everything when it comes to preserving the harvest. Ensure that you pick your produce at the peak of ripeness for optimal flavor and nutritional value. Different fruits and vegetables have different signs of readiness, so do some research or consult gardening guides to know when to harvest each type.
2. Wash Thoroughly: Before starting any preservation method, it is important to wash your produce thoroughly. Use clean, running water to remove any dirt, debris, or harmful pathogens. Gently scrub the surface of the produce using a vegetable brush if needed. This step helps eliminate any potential contaminants and ensures the longevity of your preserved food.
3. Sort and Remove Imperfections: Sort through your harvest and separate any damaged or overripe produce. These imperfections can lead to spoilage and affect the overall quality of your preserved food. Remove any bruised or blemished areas, and discard any produce that is beyond salvageable.
4. Trim and Cut: Depending on the preservation method you choose, you may need to trim and cut your produce into specific sizes or shapes. For example, if you plan to can fruits, you may need to slice them into evenly-sized pieces. If you are freezing vegetables, you may need to blanch and chop them accordingly. Follow the instructions of your chosen preservation method to ensure proper preparation.
5. Use Fresh and Quality Produce: The quality of your preserved food heavily relies on the quality of the produce you use. Always aim to use fresh, ripe, and quality fruits and vegetables. Avoid using produce that is overly ripe, as it can affect the texture and taste of the preserved food.
5. Step-by-step guide to canning fruits and vegetables
Step 1: Gather your supplies
Before you begin, ensure that you have all the necessary equipment, including canning jars, lids, bands, a large stockpot, a canning rack or kitchen towel, a jar lifter, a funnel, a bubble remover, and a ladle. It’s also essential to have fresh and high-quality fruits and vegetables at their peak ripeness.
Step 2: Prepare the jars and lids
Thoroughly wash the canning jars, lids, and bands in hot soapy water. Rinse them well and place them in a large pot filled with water. Bring the water to a simmer, ensuring that the jars are completely submerged. Let them simmer for at least 10 minutes to sterilize.
Step 3: Prepare the fruits or vegetables
Wash, peel, and chop your chosen fruits or vegetables according to your desired canning method. Some fruits may require blanching or precooking to preserve their texture and flavor. Follow specific recipes or guidelines for each type of produce to ensure the best results.
Step 4: Fill the jars
Using a sterilized funnel, carefully pack the prepared fruits or vegetables into the jars, leaving a recommended headspace. Add any desired sweeteners or spices, such as sugar or cinnamon, as per your taste preferences or recipe instructions. Remove any air bubbles using a bubble remover or a non-metallic utensil.
Step 5: Apply the lids and bands
Wipe the rims of the jars with a clean, damp cloth to remove any residue or food particles. Place the sterilized lids on top and secure them with the bands, ensuring that they are not overly tightened. This allows air to escape during the canning process.
Step 6: Process the jars
Place the filled jars on a canning rack or a kitchen towel inside a large stockpot filled with enough water to cover the jars by at least an inch. Bring the water to a gentle boil and process the jars for the recommended time based on the type of produce and altitude guidelines. Adjust the processing time for higher altitudes as needed.
Step 7: Remove and cool the jars
Using a jar lifter, carefully remove the processed jars from the boiling water and place them on a clean kitchen towel or a cooling rack. Avoid tilting or shaking the jars to prevent any disruption in the sealing process. Let the jars cool undisturbed for 12 to 24 hours.
Step 8: Test the seals and store
After the cooling period, check the seals by pressing down on the center of the lids. If the lids do not flex or make a popping sound, the jars are properly sealed. Label the jars with the contents and date, and store them in a cool, dark place. Properly sealed jars can be stored for up to a year, ensuring that you can relish the flavors of your preserved fruits and vegetables whenever you desire.
Let’s detail below few important steps and provide additional tips.
a. Sterilizing jars and lids
Proper sterilization ensures that harmful bacteria, yeasts, and molds are eliminated, providing a safe environment for your preserved foods.
To begin, gather all the necessary equipment, including glass jars, lids, a large pot or canner, tongs, and a clean kitchen towel. It’s essential to choose jars specifically designed for canning, as they are made to withstand the high heat required for sterilization and canning.
Start by thoroughly washing the jars and lids with hot soapy water. Pay close attention to removing any dirt, debris, or sticky residue. Rinse them well to remove any soap residue, as this can affect the taste and quality of your preserved foods.
Once clean, carefully place the jars and lids in a large pot or canner, ensuring they are completely submerged in water. Fill the pot with enough water to cover the jars by at least one inch. This extra space allows for proper heat distribution during the sterilization process.
Place the pot on the stove and bring the water to a rolling boil. Allow the jars and lids to boil for at least 10 minutes to ensure effective sterilization. If you live at a high altitude, consult a reliable source for adjusted processing times, as higher altitudes may require longer boiling times.
After the designated sterilization time, use tongs to carefully remove the jars and lids from the pot, allowing any excess water to drain back into the pot. Place them on a clean kitchen towel to air dry or use a drying rack specifically designed for canning.
It’s important to note that once the jars and lids have been sterilized, it’s crucial to handle them with clean hands or utensils to avoid introducing bacteria or contaminants. Avoid touching the inner surfaces of the jars or the underside of the lids.
Sterilized jars and lids should be used promptly for preserving your fruits, vegetables, sauces, or other homemade delicacies. Remember to fill the jars while both the food and jars are still hot, as this helps create a vacuum seal, extending the shelf life of your preserved goods.
b. Filling and sealing the jars
Once the jars are prepared, it’s time to fill them with the preserved food. Carefully ladle or pour the contents into each jar, leaving an appropriate amount of headspace. The headspace allows for expansion during the sealing process and helps prevent the jars from breaking or leaking.
To ensure a tight seal, wipe the rim of each jar with a clean, damp cloth to remove any food residue or debris. This step is crucial to achieving a proper seal. Next, place a lid on top of each jar, making sure the sealing compound is facing down. Gently screw on the band until it is fingertip tight. It’s important not to overtighten the band as this can interfere with the sealing process.
Now it’s time to process the filled jars. Depending on the specific food preservation method you are using, such as water bath canning or pressure canning, the processing time and method may vary. It’s crucial to follow a trusted recipe or guideline to ensure the food is processed at the correct temperature and for the necessary duration.
Once the processing time is complete, carefully remove the jars from the canner using jar lifters or tongs. Place them on a clean towel or cooling rack, allowing them to cool undisturbed. As the jars cool, you may hear a satisfying “pop” sound, indicating a successful seal. However, it’s important to note that not all seals make an audible sound, so visually inspect each jar for signs of a properly sealed lid.
After the jars have cooled completely, check the seals by pressing down on the center of each lid. A properly sealed lid should be firm and not move or flex. If any of the jars did not seal correctly, refrigerate and consume the contents within a few days or reprocess them following the appropriate method.
c. Processing the jars in a water bath or pressure canner
Once you have prepared your jars and filled them with your delicious, home-preserved goods, the next step is to process them in a water bath or pressure canner. This step is crucial to ensure the safety and longevity of your preserved foods.
The water bath canning method is suitable for high-acid foods such as fruits, pickles, and tomatoes. It involves submerging the sealed jars in a large pot of boiling water for a specific period of time. The heat from the boiling water creates a vacuum seal inside the jars, preventing any bacteria or air from entering and spoiling the food. This method is relatively simple and widely used among home canners.
On the other hand, pressure canning is necessary for low-acid foods such as vegetables, meats, and soups. These foods require higher temperatures to eliminate the risk of botulism, a deadly foodborne illness. A pressure canner is a specialized pot with a built-in pressure gauge that allows you to reach and maintain the required temperature. The sealed jars are placed inside the canner, and as the pressure builds up, the internal temperature rises, effectively killing any harmful bacteria or microorganisms.
It is important to note that not all foods can be safely preserved using the water bath or pressure canning methods. Some foods, like dairy products and certain types of sauces, may require different preservation techniques such as freezing or dehydrating.
Before processing your jars, make sure to consult reliable canning resources or guidelines to determine the appropriate processing times and methods for the specific food you are preserving.
d. Storing and labeling canned goods
First and foremost, it is important to store your canned goods in a cool, dark, and dry place. This could be a pantry, cellar, or even a dedicated storage area. Avoid areas that are prone to temperature fluctuations or exposure to direct sunlight, as these factors can compromise the quality and safety of your preserved foods.
Additionally, it is essential to properly label your canned goods. This step might seem simple, but it plays a crucial role in keeping your kitchen organized and ensuring that you can easily locate specific items when needed. Use waterproof and permanent markers to label the jars with the contents and the date of canning. This information will help you keep track of the age of your preserved goods and prioritize their consumption accordingly.
Consider creating a system for categorizing your canned goods, such as grouping them by type (fruits, vegetables, sauces) or by the date of preservation. This organization will not only make it easier to find what you need but also allow you to rotate your stock efficiently, consuming the oldest items first.
To take your labeling a step further, you can also include any additional information that may be helpful. This could include specific instructions for use, special dietary considerations, or even the source of the produce. These extra details can be especially beneficial if you plan on sharing or gifting your preserved goods with others.
6. Tips and tricks for successful freezing of fruits, vegetables, and other perishable foods
Freezing is one of the most popular and effective methods of food preservation. It allows you to extend the shelf life of fruits, vegetables, and other perishable foods while maintaining their taste, texture, and nutritional value. However, successful freezing requires some tips and tricks to ensure optimal results.
Firstly, it is crucial to choose the right packaging for freezing. Use freezer-safe containers or bags that are designed to withstand low temperatures and prevent freezer burn. Be sure to remove excess air from the packaging to minimize the risk of freezer burn and maintain the quality of the food.
Before freezing fruits and vegetables, it’s essential to properly prepare them. Wash, peel, and cut them into appropriate sizes based on your intended use. Blanching is another crucial step that helps preserve the color, flavor, and texture of the produce. Blanching involves briefly immersing the fruits or vegetables in boiling water followed by an immediate plunge into ice water to stop the cooking process. This step helps to retain the nutrients and ensure better preservation.
Labeling your frozen foods is key to efficient organization and easy retrieval. Clearly mark each package with the name of the food, the date, and any additional details you may find helpful. This will prevent any confusion later on and allow you to maintain a well-organized freezer inventory.
When it comes to freezing liquids such as soups, sauces, or stocks, leave some headspace in the container to allow for expansion during freezing. Liquids tend to expand when frozen, and insufficient headspace may cause containers to burst or leak.
To ensure the best quality and flavor, it’s advisable to consume frozen foods within their recommended storage times. While frozen foods can be safe to eat indefinitely if properly stored, their quality may deteriorate over time. Refer to food safety guidelines to determine the recommended storage times for different types of frozen foods.
a. Prepping the food for freezing
When it comes to vegetables, blanching is a crucial step to preserve their color, texture, and nutritional value. Blanching involves briefly boiling the vegetables, followed by a quick plunge into ice-cold water to halt the cooking process. This helps to retain the vibrant colors and crispness of the vegetables. After blanching, make sure to drain them thoroughly to remove excess moisture.
For herbs, freezing is a great way to preserve their flavors. Wash the herbs gently, pat them dry, and remove any tough stems. You can choose to freeze them as whole leaves or chop them finely before freezing. Herbs can be frozen in ice cube trays with a little water or oil, or simply placed in airtight containers or freezer bags.
Once your fruits, vegetables, or herbs are ready, portion them into suitable containers or freezer bags. It’s important to remove as much air as possible from the packaging to prevent freezer burn. Label each container or bag with the contents and date of freezing for easy identification later on.
Remember to always follow recommended freezing times for different types of produce to ensure optimal quality. Freezing too quickly or too slowly can affect the texture and taste of the food.
b. Selecting appropriate freezer containers or bags
First and foremost, choose containers or bags that are specifically designed for freezing. These are made with materials that can withstand low temperatures and are less prone to freezer burn. Look for options that are labeled as freezer-safe or specifically mention their suitability for freezing.
For solid containers, such as plastic or glass, make sure they have a tight-fitting lid to prevent air exposure. This will help to maintain the freshness and prevent freezer odors from seeping into your food. Mason jars with freezer-safe lids are a popular choice for preserving sauces, soups, and other liquids.
When it comes to freezer bags, opt for those that are thick and sturdy. Avoid using regular sandwich or storage bags, as they may not provide adequate protection against freezer burn. Look for bags made with multiple layers of plastic or with a reinforced design.
Before filling your containers or bags, ensure that your produce is properly prepped. Clean and trim fruits and vegetables, removing any bruised or damaged portions. For items like berries or sliced fruits, it’s a good idea to spread them out on a baking sheet and freeze them individually before transferring them to bags or containers. This will prevent them from clumping together and make it easier to portion out later.
Remember to leave some headspace in your containers or bags, as liquids tend to expand when frozen. This will help prevent any leaks or bursting. Label each container or bag with the contents and date of freezing, so you can easily identify them later and keep track of their freshness.
c. Properly labeling and storing frozen foods
Use waterproof and freezer-safe labels to clearly indicate the contents of each package, along with the date of freezing. This information will help you keep track of freshness and ensure you rotate your stock correctly, using the oldest items first.
Additionally, consider including any relevant cooking or reheating instructions on the labels. This will be especially helpful for convenience when you’re ready to use the frozen foods in your recipes.
Finally, always remember to store your packaged and labeled frozen foods in the coldest part of the freezer to maintain their quality. Avoid frequent temperature fluctuations by organizing your freezer space effectively and keeping it well-organized.
d. Best practices for thawing and using frozen foods
It’s important to thaw frozen foods properly. The safest method is to thaw them in the refrigerator. Simply transfer the frozen food from the freezer to the refrigerator and allow it to thaw slowly overnight or for a few hours, depending on the size and thickness of the item. This gradual thawing process helps prevent the growth of harmful bacteria.
If you need to thaw the food quickly, you can use the microwave or cold water methods. When using the microwave, make sure to follow the manufacturer’s instructions and use the defrost setting, if available. Be cautious not to partially cook the food during the defrosting process. When using the cold water method, place the frozen food in a leak-proof plastic bag and submerge it in cold water. Change the water every 30 minutes until the food is thawed. Avoid using hot water as it can promote bacterial growth.
Once the food is thawed, it is important to use it promptly. Do not refreeze previously frozen food unless it has been cooked thoroughly. Freezing and thawing can affect the texture and quality of the food, so it is best to consume it within a reasonable time frame.
When using thawed frozen foods, consider incorporating them into recipes that involve cooking or baking. This helps ensure that any bacteria that may have multiplied during the thawing process are eliminated through proper cooking temperatures. Additionally, cooking or baking can help enhance the flavors and textures of the thawed foods.
7. Exploring the art of drying foods
From the crisp and tangy apple chips to the chewy and aromatic sun-dried tomatoes, dried foods offer a unique culinary experience that can be enjoyed year-round.
There are various methods of drying foods, each with its own charm and benefits. The traditional method of sun drying involves placing sliced or whole foods on drying racks under the warm rays of the sun. This slow and natural process allows the food to slowly dehydrate, intensifying its flavors while retaining its vibrant colors.
Another popular method is air drying, which involves hanging bundles of herbs or strings of chili peppers in a well-ventilated area. The gentle airflow aids in the evaporation of moisture, resulting in beautifully dried herbs and spices that can be used to enhance the flavors of countless dishes.
For those who prefer a more modern approach, using a food dehydrator is an excellent option. These appliances provide controlled temperatures and airflow, ensuring consistent and efficient drying. With adjustable settings, you can customize the drying process to achieve the desired texture and moisture content for different types of foods.
Once your foods are dried to perfection, proper storage is crucial to maintain their quality. Store them in airtight containers or vacuum-sealed bags in a cool, dark, and dry place to prevent moisture absorption and protect them from light and heat.
a. Preparing food for drying
Before you start the drying process, it’s crucial to properly prepare your food. This step ensures that your fruits, vegetables, herbs, or meats dry effectively and retain their quality throughout the process.
For fruits, such as apples or berries, slicing them into uniform pieces is ideal. This allows for even drying and prevents any uneven texture or moisture retention. Similarly, vegetables like tomatoes or peppers should be sliced or diced to facilitate the drying process.
Herbs, on the other hand, require a slightly different approach. Start by gently washing them and patting them dry. Then, remove any tough stems and separate the leaves. You can either leave them whole or chop them finely, depending on your preference. It’s crucial to ensure that the herbs are spread out evenly to allow for proper airflow during drying.
If you’re working with meat, it’s essential to trim off any excess fat or connective tissue. This helps prevent spoilage and ensures a longer shelf life. Slice the meat into thin strips or small pieces to facilitate the drying process and promote even dehydration.
Once your food is properly prepared, it’s time to arrange them on your drying trays or racks. Ensure that there is enough space between each piece to allow for adequate air circulation, as this is crucial for effective drying. It’s best to follow the manufacturer’s instructions for your specific drying method, whether you’re using a dehydrator, an oven, or the traditional sun-drying technique.
b. Drying times and temperatures for different foods
Different foods require different drying times and temperatures to achieve optimal preservation. For example, fruits like apples and berries usually take around 6 to 12 hours to dry at a temperature of 135°F (57°C). On the other hand, vegetables such as tomatoes or peppers may take around 10 to 24 hours at a slightly lower temperature of 125°F (52°C). It is important to note that these are general guidelines, and the actual drying time can vary based on factors like humidity levels and the thickness of the food slices.
When it comes to herbs, delicate leaves like basil or mint can be dried at a lower temperature of 95°F (35°C) for about 2 to 4 hours. However, hardier herbs like rosemary or thyme may require a higher temperature of 110°F (43°C) for approximately 4 to 6 hours.
If you are considering drying meat or fish, it is crucial to ensure the food reaches a safe internal temperature to prevent the growth of harmful bacteria. The USDA recommends drying meat at a temperature of 160°F (71°C) for at least 4 hours to ensure proper preservation.
Depending on the technique you choose, it is essential to monitor the drying process carefully and make adjustments to the drying times and temperatures as needed.
c. Storing and rehydrating dried foods
When it comes to storing dried foods, the key is to keep them in a cool, dry, and dark place. Exposing them to light, heat, or humidity can lead to spoilage or loss of quality. Optimal storage containers include airtight jars, vacuum-sealed bags, or food-grade plastic containers with tight-fitting lids. Labeling each container with the type of dried food and the date of preservation can help you keep track of freshness and rotation.
To preserve the flavor and nutritional value of dried foods, it’s important to rehydrate them properly. Depending on the food item, there are various methods you can employ. For fruits, soaking them in water for a specific period, or simmering them in a liquid, can restore their juiciness and plumpness. Vegetables, on the other hand, may require blanching before rehydration to soften their texture.
For grains and legumes, soaking them overnight in water allows them to absorb moisture and become tender. This process not only rehydrates the food but also reduces cooking time. Herbs and spices can be rehydrated by simply adding them to your cooking or by infusing them in warm water or oil to release their flavors.
It’s worth noting that the rehydration process may vary depending on the specific dried food being used. Some foods require longer soaking times, while others may need to be cooked for a certain duration. Following recipes and guidelines specific to each type of food will help you achieve the best results.
8. The science and benefits of fermentation
The science behind fermentation lies in the metabolic activities of these microorganisms. They consume the sugars present in the food and produce various byproducts, including lactic acid, acetic acid, and carbon dioxide. These byproducts not only create a tangy and unique taste but also act as natural preservatives, inhibiting the growth of harmful bacteria and preventing spoilage.
One of the key benefits of fermentation is its ability to increase the bioavailability of nutrients in food. The fermentation process breaks down complex carbohydrates, proteins, and fats into simpler forms that are easier for our bodies to digest and absorb. This results in an increase in the levels of vitamins, minerals, and beneficial enzymes, making fermented foods highly nutritious.
Moreover, fermented foods promote a healthy gut microbiome. The consumption of fermented foods introduces beneficial bacteria into our digestive system, which can help improve digestion, boost immunity, and support overall gut health. These probiotics, as they are commonly referred to, can help restore the natural balance of bacteria in the gut, which is often disrupted by factors like stress, unhealthy diets, or the use of antibiotics.
In addition to the health benefits, fermentation also offers a world of flavors and culinary possibilities. From tangy sauerkraut and kimchi to savory miso and soy sauce, fermented foods add depth and complexity to dishes. The unique flavors developed during fermentation can enhance the taste of various ingredients, making them more enjoyable and versatile in cooking.
a. Fermenting vegetables, fruits, and beverages
To begin fermenting vegetables, start by selecting fresh produce that is firm and free from any signs of spoilage. Popular choices for fermentation include cabbage, cucumbers, carrots, and radishes. These can be sliced, shredded, or left whole, depending on your preference. The next step involves creating a brine solution, usually consisting of water and salt, to create an environment that promotes the growth of beneficial bacteria while inhibiting the growth of harmful bacteria.
Place the vegetables in a clean jar, ensuring they are tightly packed and fully submerged in the brine. This eliminates the presence of oxygen, which can lead to undesirable mold growth. Seal the jar with an airtight lid or use fermentation weights to keep the vegetables submerged. Allow the fermentation process to take place at room temperature for several days or weeks, depending on the desired level of tanginess. Taste the vegetables periodically to monitor their progress and transfer them to the refrigerator once they have reached your desired flavor profile.
In addition to fermenting vegetables, fruits can also be transformed into delicious creations. Take advantage of seasonal abundance by fermenting fruits like berries, apples, or even citrus. The natural sugars in the fruits provide a perfect medium for fermentation, resulting in unique flavors and textures. Whether enjoyed as a topping for yogurt or incorporated into baked goods, fermented fruits add a delightful twist to your culinary repertoire.
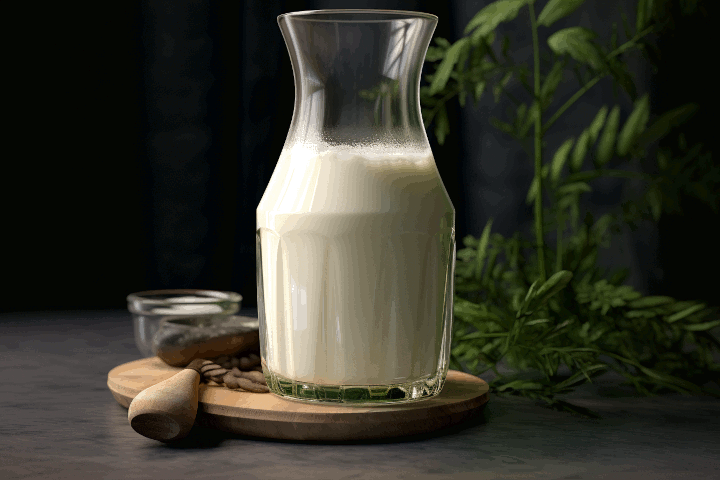
Beyond produce, beverages can also undergo fermentation to create a wide range of flavors and health benefits. Kombucha, a fermented tea, has gained popularity for its refreshing taste and probiotic properties. By introducing a culture known as a SCOBY (symbiotic culture of bacteria and yeast) to sweetened tea, the mixture undergoes fermentation, resulting in a lightly effervescent beverage packed with beneficial bacteria. Another example of fermented beverages is kefir, a fermented milk drink.
b. Storing fermented foods
Storing fermented foods is a crucial step in the preservation process. After weeks or even months of patiently waiting for the fermentation to complete, you want to ensure that the flavors and textures are preserved for future enjoyment. Whether you’ve made sauerkraut, kimchi, or any other fermented delicacy, proper storage techniques are key to maintaining their quality.
It’s important to transfer your fermented foods to appropriate containers for storage. Glass jars with airtight lids are highly recommended, as they provide a barrier against air and moisture. Make sure the jars are clean and sterilized before transferring the fermented foods to prevent any unwanted bacteria from affecting the flavor or causing spoilage.
Once you’ve transferred the fermented foods to the jars, it’s important to store them in a cool and dark place. Fermented foods are sensitive to heat and light, which can degrade their flavors and compromise their quality. A pantry or cellar with a consistent temperature is an ideal storage location. Avoid placing the jars near heat sources or in direct sunlight, as this can lead to undesirable changes in taste and texture.
To further protect your fermented foods, consider adding a layer of brine or a thin layer of oil on top. This extra layer acts as a protective seal, preventing contact with air and reducing the risk of mold or spoilage. Remember to leave some headspace in the jars to allow for natural expansion during storage.
As usual, labeling your jars with the date of fermentation is a simple but effective way to keep track of their freshness. This way, you can prioritize consuming the older batches first and maintain a rotation system to ensure that no jars are forgotten at the back of the storage shelves.
Lastly, regular inspection is essential to ensure the quality and safety of your stored fermented foods. Check for any signs of spoilage, such as off odors, mold growth, or unusual textures. If any jars show signs of spoilage, it’s best to discard them to prevent any potential health risks.
9. The art of pickling and its versatility
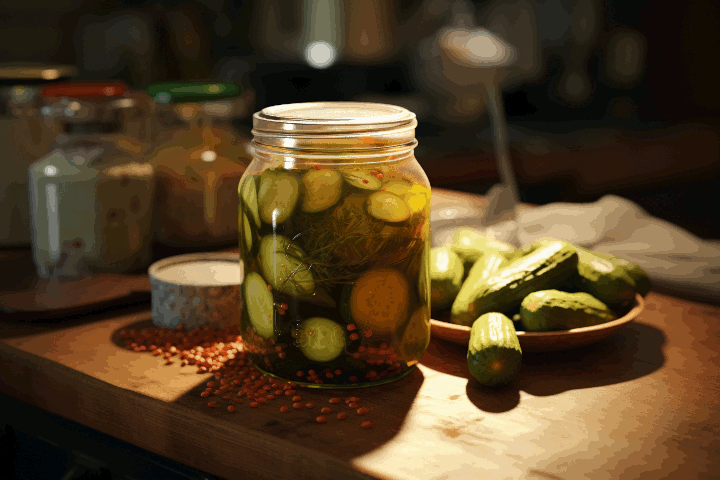
Pickling involves soaking fruits or vegetables in a brine solution made of vinegar, water, and salt. This acidic environment inhibits the growth of bacteria and extends the shelf life of the preserved produce. However, pickling is not limited to just cucumbers and onions. You can pickle almost anything – be it carrots, beets, green beans, or even watermelon rinds.
One of the greatest advantages of pickling is the ability to customize flavors. By adding various herbs, spices, and seasonings to the brine, you can create unique and delicious combinations that suit your taste preferences. From dill and garlic for a classic dill pickle to cinnamon and cloves for pickled apples, the possibilities are endless.
Furthermore, pickled vegetables and fruits can be used in a multitude of ways. They make excellent additions to sandwiches or salads, bringing a burst of flavor and a satisfying crunch. Pickled jalapenos can spice up your tacos, while pickled beets can add vibrant color to your grain bowls. You can even experiment with pickling eggs, creating a tangy and savory treat that pairs well with a variety of dishes.
a. Pickling basics
To get started with pickling, you’ll need a few essential ingredients and equipment. First and foremost, you’ll need fresh produce that is suitable for pickling. Crisp cucumbers, crunchy carrots, and tangy onions are popular choices, but don’t limit yourself – almost any vegetable or even some fruits can be pickled.
Next, gather your pickling brine ingredients. The basic brine typically consists of vinegar, water, salt, and sugar. However, you can experiment with different types of vinegar, such as apple cider vinegar or rice vinegar, to add unique flavors to your pickles. Additionally, you can consider spices and herbs like dill, mustard seeds, garlic, and peppercorns to enhance the taste and aroma.
Once you have your ingredients ready, you’ll need jars or containers with airtight lids for storing your pickles. Mason jars are a popular choice, as they are easy to find and provide a tight seal. Make sure to sterilize your jars before use to maintain the freshness and quality of your pickles.
Now that you have everything prepared, it’s time to start the pickling process. Begin by washing and cutting your chosen produce into desired shapes – slices, spears, or even whole. This step ensures that your pickles will be evenly flavored. You can also blanch some vegetables to maintain their texture before pickling.
Next, bring your pickling brine to a boil, allowing the flavors to meld together. Once the brine is ready, carefully pack your prepared vegetables into the sterilized jars. Pour the hot brine over the vegetables, ensuring they are completely submerged. Seal the jars tightly and let them cool to room temperature.
After pickling, it’s important to let your creations rest for a period of time to fully develop the flavors. The length of time varies depending on the recipe and desired taste – some pickles are ready to enjoy within a day, while others may require a few weeks to reach their peak flavor.
b. Tips for achieving the perfect balance of flavor in pickles
When it comes to making pickles, achieving the perfect balance of flavor is key. Pickles should be tangy, crisp, and packed with just the right amount of seasoning. Here are some tips to help you achieve pickle perfection:
1. Choose the right cucumbers: Look for firm, small to medium-sized cucumbers, and if possible specifically labeled as pickling cucumbers. These cucumbers have a higher water content and thinner skin, which makes them perfect for pickling.
2. Brine it right: The brine is what gives pickles their signature tangy flavor. To achieve the perfect balance of flavor, you’ll want to create a brine that combines vinegar, water, salt, and sugar in the right proportions. Experiment with different ratios to find the taste that suits your palate.
3. Spice it up: Adding spices and herbs to your pickles can elevate their flavor profile. Common spices used in pickle recipes include dill seeds, mustard seeds, garlic, peppercorns, and red pepper flakes. The key is to strike a balance between the spices, ensuring that none overpower the delicate flavor of the cucumbers.
4. Give it time: Patience is key when it comes to achieving the perfect flavor in pickles. After you’ve prepared your pickles, let them sit in the brine for at least a few days to allow the flavors to meld and develop. The longer they sit, the more the flavors will intensify.
5. Taste and adjust: Throughout the pickling process, it’s important to taste your pickles to ensure they’re developing the desired flavor. If they’re too sour, you can add a bit more sugar to balance it out. If they’re lacking tanginess, you can add a splash of vinegar. Keep experimenting until you achieve the perfect balance.
10. Preserving herbs and spices
Preserving herbs and spices is a wonderful way to capture the vibrant flavors and aromas of fresh ingredients, ensuring you have a stockpile of culinary magic at your fingertips throughout the year. Whether you’ve grown your own herbs or purchased them from a local market, preserving them allows you to savor their essence long after the growing season has ended.
a. Drying herbs for culinary use
The process of drying herbs is simple and requires minimal equipment. First, start by harvesting your herbs at their peak, when the essential oils are at their highest concentration. This is usually in the morning after the dew has dried but before the sun gets too hot. Gently remove any dirt or pests, and give them a quick rinse if necessary. Pat dry with a clean kitchen towel.
Next, you have a few options for drying your herbs. One popular method is air drying, which requires hanging the herbs upside down in a well-ventilated area. Tie small bunches of herbs together with twine or rubber bands and hang them in a cool, dry place away from direct sunlight. This slow drying process allows the herbs to retain their flavors and colors.
Alternatively, you can use a dehydrator to speed up the drying process. Spread the herbs in a single layer on the trays of your dehydrator, making sure there is enough space for air circulation. Set the temperature to the recommended setting for herbs and let them dry for several hours. Keep an eye on them to prevent overdrying, as this can result in loss of flavor.
Once the herbs are fully dried, store them in airtight containers away from direct light and heat. Mason jars or spice jars work well for this purpose. Label each container with the herb’s name and date of drying to ensure freshness and easy identification.
When it comes to using your dried herbs, remember that they are more potent than fresh herbs. As a general rule, use about one-third to one-half of the amount of dried herbs called for in a recipe that calls for fresh herbs. Crush or crumble the dried herbs between your fingers or use a mortar and pestle to release their flavors before adding them to your dishes.
b. Making herb-infused oils and vinegars
Making herb-infused oils and vinegars is a delightful way to capture the essence and flavors of fresh herbs, preserving them for future culinary adventures. These infused oils and vinegars not only add a burst of flavor to your dishes but also serve as beautiful and thoughtful homemade gifts for friends and family.
To get started, gather your favorite herbs such as basil, rosemary, thyme, or oregano, along with high-quality oils and vinegars of your choice. Extra virgin olive oil is a popular choice for herb-infused oils, while white wine vinegar or apple cider vinegar work well for vinegars.
Begin by thoroughly washing and drying the herbs to remove any dirt or moisture. Bruise or lightly crush the herbs to release their essential oils and enhance the infusion process. Place the herbs in clean, sterilized glass jars, leaving some room at the top for expansion.
Next, heat the oil or vinegar gently in a saucepan until it is warm but not boiling. Pour the warmed liquid over the herbs, ensuring they are fully submerged. Seal the jars tightly and store them in a cool, dark place for several weeks, allowing the flavors to meld and intensify.
During the infusion period, it’s crucial to periodically check the jars for any signs of spoilage, such as mold or off odors. If any issues arise, discard the contents and start again with fresh ingredients.
Once the desired infusion time has passed, strain the oil or vinegar through a fine-mesh sieve or cheesecloth to remove the herb solids. Transfer the infused liquid into clean, sterilized bottles, preferably ones with airtight seals to maintain freshness.
The resulting herb-infused oils can be used in a variety of culinary applications, whether drizzled over salads, roasted vegetables, or grilled meats. They also make a wonderful base for homemade salad dressings or marinades, adding a depth of flavor that is unmatched.
Similarly, herb-infused vinegars bring a tangy and herbaceous twist to salad dressings, marinades, and even homemade pickles. Their vibrant colors and aromatic profiles make them an attractive addition to any pantry or kitchen countertop.
Remember to label your herb-infused oils and vinegars with the date of preparation to ensure you prioritize their use before their flavor begins to fade. When stored properly in a cool, dark place, these culinary creations can last for several months, allowing you to enjoy the taste of freshly harvested herbs throughout the year.
Experiment with different herb combinations and types of oils or vinegars to discover your favorite flavor profiles. With a little creativity and patience, you’ll have a collection of herb-infused oils and vinegars that will elevate your culinary creations and bring a touch of homemade charm to your kitchen.
c. Creating homemade spice blends for long-lasting freshness
Creating homemade spice blends is a wonderful way to preserve the flavors of the harvest and ensure long-lasting freshness in your culinary creations. By following simple recipes and techniques, you can elevate your cooking experience while adding a personal touch to your dishes.
One of the benefits of creating your own spice blends is the ability to customize flavors according to your preference. Whether you enjoy a subtle hint of heat, a burst of citrus, or a medley of aromatic herbs, the possibilities are endless. By sourcing high-quality spices and herbs, you can create blends that are far superior to store-bought options.
To start, gather a variety of dried herbs, spices, and seeds. Popular choices include basil, thyme, oregano, cumin, coriander, garlic powder, paprika, and chili flakes. Consider experimenting with lesser-known spices like cardamom, turmeric, or sumac to add depth and complexity to your blends.
Next, it’s time to get creative. Begin with a base spice, such as paprika or cumin, and gradually add other ingredients to achieve the desired flavor profile. Keep in mind that a little goes a long way, so start with small quantities and adjust as needed. You can also add a pinch of salt or sugar to balance the flavors and enhance the overall taste.
Once you’ve created your custom blend, it’s essential to store it properly to maintain its freshness. Use airtight containers, preferably glass jars, to protect the spices from moisture, light, and air. Label each jar with the name of the blend and the date of creation to ensure you use them in a timely manner.
Homemade spice blends can be used in a multitude of dishes, from marinades and dressings to soups, stews, and roasted vegetables. They infuse each bite with a burst of flavor, transforming ordinary meals into extraordinary culinary experiences.
11. Embracing the tradition of food preservation
So here we are, we covered a lot about the ins and outs of preservation, but let’s be real, nothing beats hands-on experience. Every fruit, veggie, and season can throw you a curveball. So, my last words will be: grab some jars, pick out your favorite produce, and just dive in. You might have a few hiccups along the way, but that’s how you’ll find what works best for you. Remember, nature isn’t always predictable, and that’s part of the fun. So, roll up those sleeves and give it a shot. Trust me, there’s nothing like the taste of something you’ve preserved yourself.