
A family of 4 in the U.S. uses about 30 kWh per day on average. A basic DIY solar setup that covers your critical loads — fridge, lights, phone charging, a few fans — runs between $800 and $4,000 depending on whether you’re going portable, partial backup, or full home off-grid. This guide cuts through the jargon and tells you exactly what to buy, what to build, and what to hire out, based on your budget and goal.
Three Tiers of DIY Solar — Pick Your Level
Before buying components, decide what problem you’re actually solving:
| Tier | Goal | Cost | Setup difficulty | Permits needed? |
|---|---|---|---|---|
| Tier 1: Portable solar station | Charge phones, run lights + fans for 1–3 days | $500–$1,500 | Plug-and-play, no wiring | No |
| Tier 2: Partial backup system | Run fridge, lights, router, phones for 3–7 days | $1,500–$4,000 | DIY wiring to critical circuit panel | Depends on state |
| Tier 3: Full home solar | Replace most/all grid electricity, net metering | $10,000–$30,000+ | Professional installation required | Yes |
This guide focuses on Tiers 1 and 2 — the practical prep-focused solar builds. Tier 3 (full home solar) requires licensed electricians, utility coordination, and permits; the DIY scope there is system design and cost control, not physical installation.
Step 1: Calculate Your Critical Load
Don’t guess. List every device you need to run during an outage and how long you’ll run it. Here’s the math for a typical family of 4:
| Device | Wattage | Hours/day | Wh/day |
|---|---|---|---|
| Refrigerator (Energy Star) | ~150W avg | 24 (cycles on/off) | ~1,200 Wh |
| LED lights (4 rooms) | 10W × 4 = 40W | 6 | 240 Wh |
| Phone charging (4 phones) | 15W × 4 = 60W | 2 | 120 Wh |
| Wi-Fi router + modem | 20W | 16 | 320 Wh |
| Ceiling fans (2) | 50W × 2 = 100W | 8 | 800 Wh |
| CPAP machine (if needed) | 30–60W | 8 | 240–480 Wh |
| Total critical loads | ~2,700–3,200 Wh/day |
So a family of 4 running only critical loads needs approximately 2.7–3.2 kWh per day. That’s your target, not your total home usage of 30 kWh/day. Designing a system to cover 3 kWh/day instead of 30 kWh/day cuts cost by 70–80%.
What you’re NOT running on a critical-load backup system: air conditioning (1,500–3,500W), electric water heater (4,500W), electric dryer (5,000W), electric stove (2,000W+). These are not critical loads for a 3–7 day emergency.
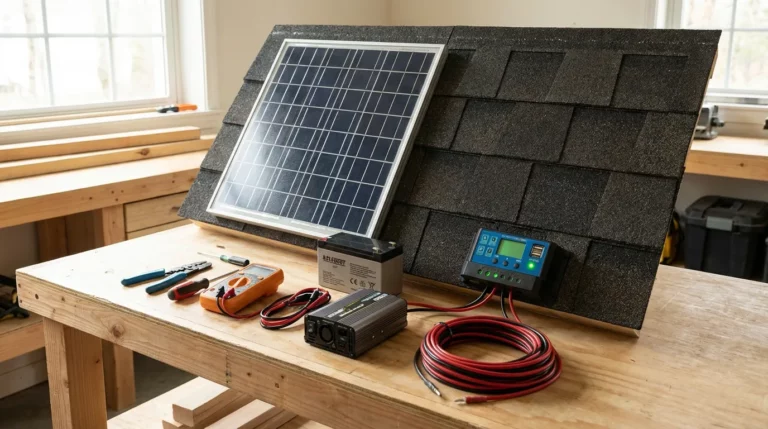
Step 2: Understand the Core Components
Solar Panels — How to Size Them
To generate 3 kWh/day, you need to account for your location’s peak sun hours (the number of hours per day when sunlight is intense enough for effective generation).
- Southwest U.S. (Phoenix, Las Vegas): ~5.5–6 peak hours/day
- Southeast (Atlanta, Houston): ~4.5–5 peak hours/day
- Northeast (New York, Chicago): ~3.5–4.5 peak hours/day
- Northwest (Seattle, Portland): ~3–4 peak hours/day
Formula: Daily Wh needed ÷ Peak sun hours = Panel wattage required
For 3,000 Wh/day in Atlanta (4.5 peak hours): 3,000 ÷ 4.5 = 667 watts of panels. Round up to 800W to account for efficiency losses — four 200W panels, or two 400W panels.
Panel Types: Monocrystalline vs. Polycrystalline vs. Thin-Film
| Type | Efficiency | Cost per watt | Best for |
|---|---|---|---|
| Monocrystalline | 20–23% | $0.50–$0.80/W | Rooftop — limited space, need maximum output |
| Polycrystalline | 15–17% | $0.40–$0.65/W | Ground mount — more space available, lower cost |
| Thin-film (CIGS/CdTe) | 10–13% | $0.50–$1.00/W | Curved surfaces, RVs, flexible applications |
For a Tier 2 home backup system: Monocrystalline 400W panels (Renogy, Newpowa, or HQST) are the standard. At ~$200–$280 each, two 400W panels (~$500 total) provide 800W of generation capacity.
Batteries — LiFePO4 vs. Lead-Acid
Your battery bank stores energy for use at night or on cloudy days. For a 3,000 Wh/day system with 2 days of autonomy, you need ~6,000 Wh of usable battery storage.
| Type | Usable capacity | Lifespan | Cost for 6 kWh usable | Notes |
|---|---|---|---|---|
| LiFePO4 (Lithium Iron Phosphate) | 80–100% | 3,000–5,000 cycles (~10 years) | $1,200–$1,800 | Best overall. Safe, lightweight, long life. |
| AGM Lead-Acid (deep cycle) | 50% (only half is usable) | 300–500 cycles (~3–5 years) | $600–$900 | Lower upfront, higher long-term cost. Heavy. |
Dan’s recommendation: LiFePO4 wins on a lifetime cost basis despite higher upfront cost. Battle Born 100Ah 12V (~$900 each) or the Ampere Time 200Ah 12V (~$550) are reliable mid-tier options. For a plug-and-play all-in-one: the EcoFlow Delta Pro (3.6 kWh, $2,500) or Bluetti AC200P (2 kWh, $1,500) integrate battery + inverter + charge controller in one unit.
Inverter — Converting DC to AC
Solar panels and batteries produce DC power. Your home runs on AC. The inverter bridges them.
- Pure sine wave inverter (required for sensitive electronics, CPAP, any motor-driven appliance): Renogy 2000W pure sine wave inverter (~$200–$300). Don’t use modified sine wave for anything important.
- Hybrid/MPPT charge controller combo: If you’re building a standalone system, the Victron SmartSolar MPPT + MultiPlus inverter/charger is the gold standard but costs $400–$800 for the controller alone.
- Budget option: For Tier 1–2 systems under 2,000W: WZRELB 2000W pure sine wave inverter ($120–$180) works reliably at lower cost.
Charge Controller
The charge controller sits between your panels and battery, managing charging current to prevent overcharging. For any system above 200W:
- MPPT controller (Maximum Power Point Tracking): 15–30% more efficient than PWM. Required for Tier 2 systems. Renogy Rover 40A MPPT (~$100) handles up to 800W of panels with a 12V battery bank.
- PWM controller: Only appropriate for small Tier 1 setups under 200W.
• Panels: 2× Renogy 400W Monocrystalline (~$500 total)
• Battery: Ampere Time 200Ah LiFePO4 12V (~$550)
• Charge controller: Renogy Rover 40A MPPT (~$100)
• Inverter: Renogy 2000W Pure Sine Wave (~$250)
• Wiring + breakers + connectors: ~$100–$150
• Total: ~$1,500–$1,600 — covers 2 kWh/day of critical loads (fridge + lights + phones + fans)
Step 3: Choose Your System Type
Off-Grid System
No grid connection. 100% self-contained. Required for remote properties, cabins, or full energy independence. The challenge: you must size your battery bank for worst-case cloudy stretches (3–5 days in most U.S. locations). For a family of 4 at 3 kWh/day × 5 days = 15 kWh of battery storage needed — roughly $2,500–$4,000 in LiFePO4 batteries alone.
Grid-Tied System (No Battery)
The most common residential solar configuration. Your panels connect to the grid through a grid-tied inverter. Excess power feeds back to the grid (net metering). Major caveat for preppers: grid-tied systems without battery backup shut off during grid outages — a safety requirement to protect utility workers. If the grid goes down, your solar panels produce nothing.
Hybrid System (Grid-Tied + Battery Backup)
The best of both. Solar charges batteries first; batteries handle your critical loads during outages. Excess goes to the grid for credits when batteries are full. This is the configuration to build if energy resilience is your goal. Systems: Tesla Powerwall 2 ($9,200 before incentives, 13.5 kWh) or DIY with Victron Multiplus + LiFePO4 bank ($3,000–$6,000).
Step 4: Mounting Your Panels
Roof Mounting
Best for space efficiency and aesthetics. Requirements before you proceed:
- Structural assessment: Residential roofs are typically designed for 20–25 lbs/sq ft snow load. Solar panels add 2–4 lbs/sq ft — usually fine, but verify if your roof is older or has any existing damage.
- Roof direction and pitch: South-facing roof at 30–45° tilt is optimal in the continental U.S. East or west-facing roofs lose 10–20% efficiency but still work.
- Shading: Even partial shading on one panel can reduce a string’s output by 30–50%. Map shading patterns before committing to a location.
DIY roof mounting requires lag bolts into roof rafters, flashing to prevent leaks, and aluminum racking rails (IronRidge or Unirac are standard). This is DIY-able for handy homeowners — budget 2–4 hours per 4-panel array plus a helper.
Ground Mounting
Easier installation, easy access for cleaning, fully adjustable tilt angle. Requires a concrete footer or ground screw anchor system. The Renogy Ground Mount Kit (~$80–$120 for 2 panels) handles most residential setups. Ideal for families with yard space and no suitable south-facing roof section.
Step 5: Wiring and Installation
Here’s what you can DIY vs. what needs a licensed electrician:
| Task | DIY or Electrician? | Notes |
|---|---|---|
| Mount panels and racking | DIY | Low-voltage DC wiring between panels is safe for informed DIYers |
| Panel-to-charge-controller wiring | DIY | Use correctly sized MC4 connectors and AWG wire per current rating |
| Charge controller to battery bank | DIY | Add a fuse or breaker within 18″ of battery positive terminal |
| Battery bank to inverter | DIY | Thick cables (2/0 or 4/0 AWG for high-current systems), short runs |
| Inverter to home AC loads (plug-in) | DIY | Plug critical appliances directly into inverter outlets |
| Grid-tied connection to utility meter | Licensed electrician required | Requires permit, utility interconnection agreement, inspection |
| Sub-panel for critical loads (hardwired) | Licensed electrician recommended | Transfer switch installation is a permit item in most jurisdictions |
Safety non-negotiables for DIY wiring:
- Always fuse at the battery — this is the most common DIY wiring fire hazard when skipped
- Use appropriately rated wire (check current vs. AWG rating charts)
- Cover all positive terminals when not connected to prevent arc shorts
- Ground your metal panel frames and the system chassis
- Never work on the battery bank near open flame — hydrogen off-gassing from lead-acid batteries is explosive
Step 6: Net Metering and Battery Backup for Grid-Tied Systems
How Net Metering Works
With a grid-tied system and net metering, your meter spins backward when your panels produce more than you use. At billing time, you’re charged only for your net consumption. Most U.S. states have net metering laws, but the credit rate varies significantly — some utilities credit at retail rate (~$0.12–$0.20/kWh), others at wholesale (~$0.03–$0.06/kWh). Check your utility’s specific net metering policy before designing your system around grid export.
Adding Battery Backup to an Existing Grid-Tied System
If you already have solar panels with a grid-tied inverter, you can retrofit battery backup with an AC-coupled system:
- Enphase IQ Battery (3.36 kWh per module, ~$3,000–$4,000 installed): works with existing Enphase microinverters
- Tesla Powerwall 3 (13.5 kWh, ~$9,200 + installation): works with most grid-tied systems
- SolarEdge Energy Hub + LG Chem RESU: ~$8,000–$12,000 installed
DIY retrofit with Victron MultiPlus-II + LiFePO4 bank: $3,000–$5,000 in parts, requires an electrician for the AC connection but gives maximum flexibility and the best cost per kWh of storage.
Step 7: Federal Tax Credits and State Incentives
The Residential Clean Energy Credit (extended under the Inflation Reduction Act) covers 30% of your system cost through 2032, then steps down to 26% in 2033 and 22% in 2034. This applies to:
- Solar panels
- Battery storage (even without solar, as of 2023)
- Labor costs for installation
- Permit fees
Example calculation: A Tier 2 system costing $3,500 in parts and $500 in electrician labor = $4,000 total. 30% credit = $1,200 off your federal taxes. Effective system cost: $2,800.
For a full Tier 3 home solar system at $20,000: 30% credit = $6,000 off federal taxes. This is a direct tax credit, not a deduction — it reduces what you owe dollar for dollar.
State incentives vary widely. California, New York, Massachusetts, and Texas all have significant additional rebates or SREC programs. Check the DSIRE database (dsireusa.org) for your state’s current programs.
Troubleshooting Your Solar System
The most common issues with DIY solar systems and how to diagnose them:
- Low output (panels not producing expected watts): Check for shading at different times of day, clean panels (dust and bird droppings cut output 5–25%), verify MC4 connector seating, and check charge controller display for actual panel input vs. rated wattage.
- Battery not fully charging: Confirm charge controller programming matches your battery chemistry (LiFePO4 has a different charge profile than AGM). Check bulk/absorption/float voltage settings. Verify panel wattage matches charge controller capacity.
- Inverter shutting off under load: Usually undercurrent cabling to the inverter. Measure voltage at the inverter terminals under load — if it drops more than 0.5V below battery voltage, your cables are undersized. Go to thicker AWG.
- System works during day but dies overnight: Battery capacity is insufficient for your overnight load. Either add battery capacity or reduce overnight loads. A Bluetooth BMS monitor shows real-time state of charge and helps you catch this pattern before it’s a problem.
Common Mistakes in DIY Solar
- Undersizing the battery bank for the inverter. A 2,000W inverter at full load draws ~180A from a 12V battery. Most 100Ah LiFePO4 batteries are rated for 50–100A continuous discharge. Running a 2,000W inverter from a single 100Ah battery will exceed its discharge limit within minutes and trigger the BMS protection. Size your battery bank to handle peak inverter draw.
- Skipping the fuse at the battery. This is the single most common cause of DIY solar fires. A short circuit in the wiring can draw thousands of amps from a battery in milliseconds. A 200A fuse or breaker at the battery positive terminal, within 18 inches, is non-negotiable.
- Buying modified sine wave inverters. They’re cheaper ($50–$80) and they will destroy or degrade sensitive electronics — CPAP machines, laptop power supplies, variable-speed motors. Pure sine wave inverters cost $150–$300. The $100 difference is worth it every time.
- Ignoring wire sizing. Every wire in a DC system must be sized for its maximum current load. Online calculators (like the Blue Sea Circuit Wizard) make this easy. Undersized wire overheats and creates fire risk. This isn’t an area to estimate — look up the correct AWG for every run.
- Not accounting for panel degradation. Solar panels lose 0.5–0.7% efficiency per year. A 400W panel will produce ~370W at year 10. Design your system for 90% of rated output, not 100%, to ensure you still meet your load requirements years down the road.
Frequently Asked Questions
Can I legally install solar panels myself without a permit?
For off-grid systems not connected to your home’s wiring or utility grid, permits are typically not required. For any grid-tied system or hardwired connection to your home’s electrical panel, most jurisdictions require a permit and inspection. Portable systems (Tier 1) plugged into outlets require no permit. The permit process for residential solar typically costs $100–$300 and takes 2–4 weeks to approve.
How many solar panels do I need to run a refrigerator during a power outage?
An Energy Star refrigerator uses about 1,000–1,500 Wh per day. In an area with 4.5 peak sun hours, one 400W panel generates ~1,800 Wh/day — enough to run the fridge with margin left for lights and charging. You’ll also need a battery to run the fridge overnight. One 200Ah LiFePO4 battery (2,400 Wh usable) covers roughly 1.5–2 nights of refrigerator runtime without solar input.
What’s the simplest solar setup for a total beginner with a $1,000 budget?
The EcoFlow River 2 Pro (768 Wh, $500) paired with one 220W EcoFlow folding solar panel ($250) gives you a plug-and-play system for about $750. No wiring, no installation. It charges phones, runs LED lights, and can power a CPAP for 1–2 nights. Add a second battery for extended outage coverage. This is the safest starting point before investing in a hardwired system.
Is DIY solar worth it vs. hiring a professional installer?
For Tier 2 partial-backup systems, DIY saves $2,000–$5,000 in labor on a system where parts cost $1,500–$4,000. The skill requirement is basic DC wiring knowledge, which is learnable in a weekend. For Tier 3 full-home grid-tied systems, professional installation becomes more justified — the complexity increases, permits require licensed work, and the warranty considerations on a $15,000+ investment often favor professional installers who carry their own workmanship warranty.
How long does a DIY solar system last?
Quality monocrystalline panels carry 25-year performance warranties and typically last 30+ years. LiFePO4 batteries last 3,000–5,000 cycles — roughly 10 years at daily cycling or 15+ years at every-other-day use. MPPT charge controllers last 10–15 years. Pure sine wave inverters: 10–15 years with good ventilation. The shortest-lived component is usually the inverter — budget for a replacement at year 10–12 in your long-term cost calculations.
Bottom Line
A Tier 2 DIY solar backup system — 800W of panels, 200Ah LiFePO4 battery, MPPT charge controller, and 2,000W pure sine wave inverter — covers the critical loads of a family of 4 during a power outage for roughly $1,500–$1,600 in parts, reduced to ~$1,100 after the 30% federal tax credit. That’s meaningful energy resilience for a realistic budget. Start with the load calculation before buying anything, size for your critical loads only, use LiFePO4 batteries, and fuse everything at the source. The rest is connector crimping and following cable charts — nothing a weekend can’t teach. For a broader look at off-grid power options including generators and wind, see our complete off-grid power solutions guide. For comparing solar vs. gas generators specifically for preppers, see Solar vs. Gas Generator for Preppers 2026.
Dan Lockland is a preparedness instructor and survival skills educator with over 15 years of hands-on experience. He shares practical, no-nonsense guidance on emergency preparedness, self-reliance, and sustainable living at PreparingWithDan.com.