
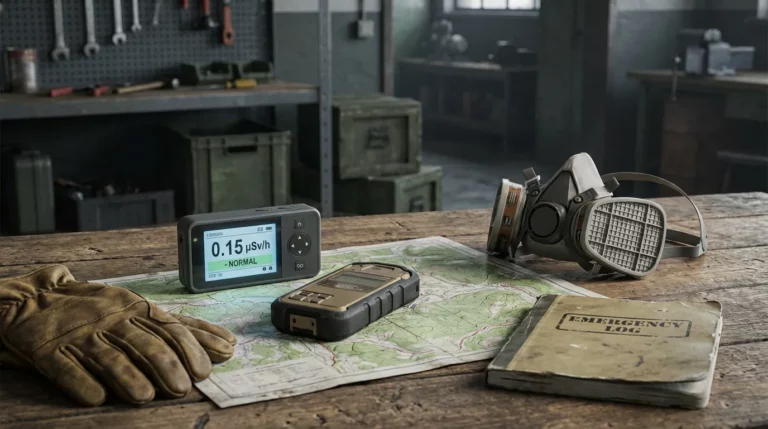
Radiation is invisible, odorless, and completely imperceptible to your senses at any level short of doses that are already causing serious internal damage. Without a detector, you are making decisions blind — whether it is safe to leave your shelter, whether your decontamination worked, whether a food source is contaminated. A radiation detector converts that invisible threat into a number you can act on. It is one of the highest-value pieces of equipment a nuclear-prepared family can own, and the entry point is a $90 Geiger counter that fits in a jacket pocket.
This guide covers what you actually need, what the different types do, how to read the numbers, and which specific products are worth buying in 2026.
What Radiation Detectors Do
Radiation detectors measure ionizing radiation — the high-energy particles and waves produced by nuclear reactions that can damage living tissue. A detector does not protect you from radiation; it tells you the level of radiation so you can make informed decisions about exposure time, evacuation routes, shelter quality, and when it is safe to emerge.
The core value in a nuclear emergency:
- Confirming whether elevated radiation is present in your area
- Monitoring radiation levels inside and outside your shelter to verify shelter effectiveness
- Verifying that decontamination was effective (comparing readings before and after showering)
- Monitoring decay rates to determine when emerging is safe
- Checking food and water for contamination levels
Types of Radiation Detectors
Geiger-Müller (GM) Counters
The most common type for consumer use. A GM tube detects gamma and X-ray radiation, and most also detect beta particles. When radiation strikes the gas in the tube, it generates an electrical pulse that is counted and displayed as counts per minute (CPM) or converted to a dose rate (usually µSv/h or mR/h). GM counters give you real-time readings and are the most useful general-purpose tool for preppers.
Personal Dosimeters
Dosimeters measure cumulative radiation dose — the total amount you have received over time, not the current rate. Film dosimeters and thermoluminescent dosimeters (TLDs) are passive (no power required) and are read after exposure. Electronic dosimeters give real-time cumulative dose readouts. For preppers, a passive dosimeter worn on your body tells you your personal accumulated dose, which is different from what your Geiger counter reads in the environment (you might be in a hot spot briefly or have been in lower radiation for a long period).
Personal Radiation Detectors / Alerters
Small devices that alarm at preset radiation levels. The NukAlert is the best-known example. They do not give you a precise reading but tell you when radiation has crossed a threshold. Good for go-bags and everyday carry for preppers who want a simple alarm without the complexity of a full Geiger counter.
Scintillation Detectors
More sensitive than GM tubes and better at detecting gamma radiation at lower levels, and can identify specific isotopes (which GM counters cannot). Generally more expensive and fragile. Used by professionals and serious preppers in high-risk areas. The Radiacode 103 ($350) is a notable consumer-grade scintillation detector that includes isotope identification.
Understanding Radiation Units
The most confusing part of radiation detection is the units. Different detectors use different scales, and understanding what the numbers mean is essential for making decisions:
| Unit | What It Measures | Reference Point |
|---|---|---|
| µSv/h (microsieverts per hour) | Dose rate (biological effect) | Normal background: 0.1–0.3 µSv/h |
| mSv/h (millisieverts per hour) | Dose rate (1000x µSv/h) | 1 mSv/h = 1000 µSv/h |
| mR/h (milliroentgens per hour) | Exposure rate (older unit) | Approx. 1 mR/h ≈ 10 µSv/h |
| CPM (counts per minute) | Raw detector events | Varies by detector sensitivity |
| mSv or mrem (total dose) | Cumulative biological dose | Annual background: ~2–3 mSv |
Key reference numbers to know:
- Normal background radiation: 0.1–0.3 µSv/h (varies by location and altitude)
- 3–10 µSv/h: Elevated — increased monitoring warranted, shelter in place if possible
- 10–100 µSv/h: Significantly elevated — limit outdoor exposure, evacuate if sustained
- 100+ µSv/h (0.1 mSv/h): Serious hazard zone — minimize all exposure
- 1 mSv/h (1000 µSv/h): Very high — dangerous for sustained exposure, evacuation if possible
Before any emergency, measure and record your home’s background radiation level. This is your personal baseline. Without it, you cannot tell whether an elevated reading during an event is meaningfully above normal for your area. Turn on your Geiger counter in three different rooms on a clear day and average the readings. Write that number on tape and stick it to the inside of your supply box.
Specific Product Recommendations
GQ GMC-300E Plus ($90) — Best Entry-Level Option
This is where I start the recommendation for most preppers. The GMC-300E Plus detects gamma and X-ray radiation well, and beta radiation at close range. It displays readings in CPM, µSv/h, or mR/h, can log data to a computer, and runs on a rechargeable battery. It is not the most sensitive detector available, but it will reliably detect radiation at levels dangerous to health and give you the readings you need to make decisions. Durable, compact, and backed by decent documentation. This is the one in our Faraday cage kit.
Radex RD1706 ($130) — Best Mid-Range Option
The RD1706 uses two GM tubes, which gives it better sensitivity at low levels than single-tube devices. It detects gamma, X-ray, and beta radiation. Displays in µSv/h. Has an audible alarm threshold you can set. More sensitive than the GQ at slightly elevated levels, which is useful for verifying decontamination effectiveness where the change may be small.
Radiacode 103 ($350) — Best Advanced Option
The Radiacode 103 is a scintillation detector that not only measures dose rate but can identify specific isotopes. This is genuinely useful in a nuclear event to know whether you are dealing with cesium-137, iodine-131, or other specific contaminants — information that affects which protective actions are most important. It connects to a smartphone app via Bluetooth for detailed data logging. For serious preparedness, this is the premium choice.
NukAlert ($160) — Best Go-Bag Alerter
A small keychain device that chirps at increasing frequency as radiation levels rise. It does not give a numerical reading, but it provides a continuous audible alert at varying radiation levels. The chirp rate changes with intensity so you get a relative sense of level without looking at a display. Good as a secondary device in a go-bag or for EDC. Long battery life (around 10 years for the internal battery).
RADTriage 50 ($30–$50) — Best Passive Dosimeter
A credit-card-sized passive dosimeter that requires no power. Changes color to indicate cumulative radiation dose. Not a precise instrument, but it tells you whether you have received a meaningful dose over time. Keep one in your go-bag and one in your emergency kit as an inexpensive backup. Good for monitoring cumulative dose during extended shelter periods.
| Device | Price | Type | Best For |
|---|---|---|---|
| GQ GMC-300E Plus | $90 | Geiger counter | Most preppers — start here |
| Radex RD1706 | $130 | Dual-tube Geiger | Better sensitivity, decon checking |
| Radiacode 103 | $350 | Scintillation detector | Isotope ID, advanced users |
| NukAlert | $160 | Alerter (no readout) | Go-bag, EDC |
| RADTriage 50 | $35 | Passive dosimeter | Cumulative dose tracking |
How to Use Your Detector in a Nuclear Emergency
Step 1: Establish baseline before any emergency. Know your normal background reading. This should be done the day you buy the detector, not after an event.
Step 2: Take initial readings at shelter location. When sheltering in place, take readings at your shelter room and compare to your baseline. A properly selected shelter (interior rooms, basement) should show lower readings than outdoor measurements. This confirms your shelter is providing meaningful protection.
Step 3: Monitor decay rates. After a nuclear detonation, fallout radiation decays following the 7-10 rule: for every 7-fold increase in time after the explosion, radiation decreases by a factor of 10. Monitor your readings over time to track this decay. This data, combined with official guidance, helps determine safe emergence timing.
Step 4: Check decontamination effectiveness. Take a reading before and after showering. Radiation levels at skin surface should drop significantly after proper decontamination. If your reading remains elevated after showering, shower again targeting the areas showing highest readings.
Step 5: Check food and water before use. Hold the detector near open food or water containers and check the reading. Sealed canned goods from before the event are safe. If open containers show elevated readings compared to background, discard them and use sealed stored supplies.
Using Smartphone Apps for Radiation Detection
There are numerous smartphone apps that claim to detect radiation. Most of them use your phone’s camera sensor (which can detect some gamma radiation) but are not calibrated, not sensitive enough for practical use, and wildly unreliable at the levels that matter. Do not rely on a smartphone app as your primary or backup radiation detection method.
The exception: the Radiacode 103 connects to a smartphone via Bluetooth and uses the phone as a display for its actual scintillation detector. In this case, the smartphone is a display, not the detector. That is a legitimate setup.
A Geiger counter is an electronic device and could be damaged by a HEMP event. Your primary detector should be stored in daily use (measuring background radiation builds detector familiarity). But keep a backup detector — even a simple $90 GQ GMC-300E Plus — in your Faraday ammo can. After an EMP event, the radiation measurement capability you need most is also the one most likely to be destroyed by the event that creates the need.
The 7-10 Rule: Using Your Detector to Determine Safe Emergence
The 7-10 rule provides a framework for estimating radiation decay after a nuclear detonation. For every 7-fold increase in time since the explosion, radiation intensity falls by a factor of 10:
- If radiation at 1 hour is 100 µSv/h → at 7 hours it is about 10 µSv/h
- At 49 hours (7 x 7) it is about 1 µSv/h
- At 343 hours (7 x 7 x 7) it is about 0.1 µSv/h (near background)
Your Geiger counter measurements taken at regular intervals confirm whether this decay is occurring at the expected rate. Readings that fall faster than expected may indicate wind dispersal. Readings that plateau may indicate persistent contamination from longer-lived isotopes. Monitor continuously and use official guidance to supplement your measurements.
Common Mistakes with Radiation Detection Equipment
- Never measuring background before an emergency. Without a baseline, a reading of 0.5 µSv/h means nothing. Is that double your background? Triple? You need to know.
- Relying on a smartphone app. Camera-based radiation detection apps are not calibrated and not accurate enough for emergency use. Buy a real detector.
- Not protecting a backup detector from EMP. If your detector is destroyed by the same event you need it for, it provides no value. Store a backup in your Faraday cage.
- Not understanding the detector’s limitations. Most consumer GM counters do not detect alpha particles at all (alpha is stopped by the detector’s housing). They detect beta particles only when held very close to the source. They detect gamma well. Know what your specific detector does and does not measure.
- Making shelter-in-place decisions based only on detector readings without official guidance. Your detector tells you what radiation levels are at your location. It does not tell you whether conditions are improving regionally, whether contamination is still arriving, or what specific hazards are present. Use your detector readings in conjunction with NOAA weather radio and official emergency management guidance.
Frequently Asked Questions
Do I really need a radiation detector, or can I rely on official alerts?
Official alerts are essential, but they cannot tell you the specific radiation level inside your home, whether your decontamination was successful, or whether it is safe to emerge from your specific shelter location. A detector bridges the gap between regional official guidance and your specific situation. For a $90 investment, the information value is significant.
What is a safe radiation level to emerge from shelter?
There is no universal safe level — it is a risk tradeoff based on duration of exposure and dose rate. FEMA and emergency management guidance uses reference thresholds. A common guidance benchmark is emerging when dose rate falls below 2 mR/h (approximately 20 µSv/h) for normal activities, but follow current official guidance from your local emergency management authorities for your specific event.
Can I check my food and water with a consumer Geiger counter?
Yes, with limitations. A Geiger counter held near food or water can detect elevated gamma and beta radiation above background. This is useful for a relative comparison, not an absolute safety determination. Sealed pre-event canned goods are safe. If your sealed containers test at background levels, they are safe. Open containers or fresh food exposed to fallout showing elevated readings above your established background should not be consumed.
How long do Geiger counters last?
The GM tube itself degrades with use (each ionization event slightly depletes it) but has a lifespan of millions of counts for most consumer devices — effectively a decade or more for typical prepper use. The electronics are the more likely failure point. Inspect and test annually. Keep batteries charged or replaced. A detector that has not been powered on in two years may have battery or component issues.
Is the Radiacode 103 worth the premium over a basic Geiger counter?
For most families starting their nuclear preparedness, no — start with the $90 GQ GMC-300E Plus and get familiar with radiation monitoring. The Radiacode’s isotope identification capability is genuinely valuable if you want to understand what specific contaminants you are dealing with, but it requires more technical knowledge to use effectively. Buy the basics first; upgrade when you have mastered them.
The Bottom Line
You cannot prepare effectively for radiation hazards you cannot measure. A radiation detector is the instrument that converts an invisible threat into actionable information: is my shelter working, did decontamination work, is it safe to leave yet, is this food safe to eat. These are decisions that determine outcomes.
Start with a GQ GMC-300E Plus ($90). Measure your baseline today. Store a backup in your Faraday ammo can. Learn to read it and what the numbers mean. Add a passive RADTriage dosimeter ($35) to your go-bag for cumulative dose tracking. This $125 combination gives you the radiation visibility that turns you from someone reacting blindly into someone making informed decisions under pressure.
The nuclear emergency you are preparing for may never happen. But the next time you want to know whether a location has elevated radon, whether your granite countertop is emitting above background, or whether a smoke detector is within safe parameters, you will already have the tool and the knowledge to find out.
Official sources & further reading
The guidance in this article aligns with official emergency-preparedness resources. Consult them for the authoritative version:

Dan Lockland is a preparedness instructor and survival skills educator with over 15 years of hands-on experience. He shares practical, no-nonsense guidance on emergency preparedness, self-reliance, and sustainable living at PreparingWithDan.com.