
Sanitation is the preparedness pillar that makes people uncomfortable and therefore gets ignored. It shouldn’t. In extended grid-down or water-off scenarios, improper waste management is a direct disease vector — cholera, typhoid, and dysentery killed more people in historical disaster scenarios than the disasters themselves. A family of 4 produces roughly 4 gallons of liquid waste and 1 lb of solid waste per day. That needs to go somewhere, reliably, regardless of whether your municipal water system is functioning.
A composting toilet gives you that “somewhere” — with options ranging from a $30 emergency bucket setup to a $1,000 off-grid residential system. This guide helps you choose the right level for your situation.
The Three Composting Toilet Options for Preppers
| Option | Cost | Use Case | Family of 4 Capacity | Effort |
|---|---|---|---|---|
| Bucket toilet kit | $30–$60 | Emergency backup, apartment, bug-out bag | Short-term (days to weeks) | Very low |
| Compact self-contained unit (Nature’s Head, Air Head) | $900–$1,100 | Primary toilet in cabin, van, RV, small home | 4–6 weeks before emptying | Low |
| Central composting system (Sun-Mar, Envirolet) | $1,500–$3,500 | Primary toilet in home, high-use location | Continuous with proper maintenance | Medium |
Most preppers starting out should begin with a bucket toilet kit ($30) as an emergency backup, then consider a compact unit if they have an off-grid property or want a water-free primary toilet.
Option 1: The Bucket Toilet — Your Emergency Baseline ($30)
For emergency preparedness specifically, a 5-gallon bucket toilet kit is the most practical and accessible option. It works immediately, requires no installation, needs no power or water, and costs almost nothing. Every prep household should have one, even if you also plan to get a commercial unit.
What You Need
- 5-gallon food-grade bucket ($4–$8)
- Snap-on toilet seat lid designed for 5-gallon buckets ($12–$20, brands: Reliance Products, Luggable Loo)
- Biodegradable waste bags sized for 5-gallon buckets ($15–$25 for 30 bags)
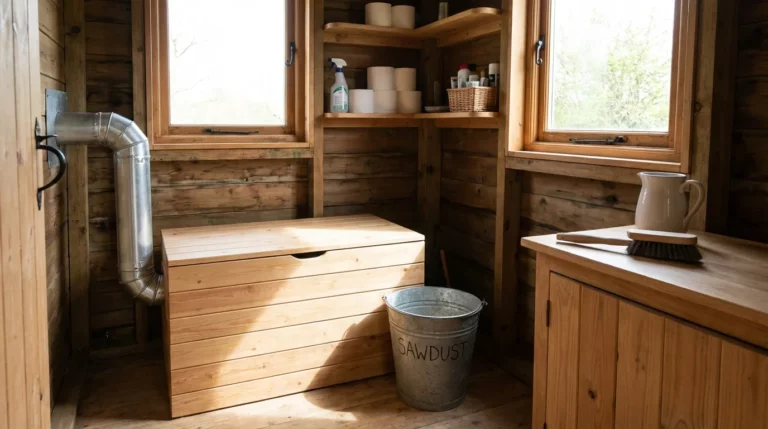
- Cover material: peat moss, sawdust, or cat litter ($10–$20 for a bag)
Total cost: ~$40–$60
How to Use It
- Line the bucket with a waste bag
- Add 1–2 cups of cover material to the bottom of the bag
- After each use, add another cup of cover material — this absorbs moisture, controls odor, and starts decomposition
- Seal and dispose of bags when full (typically 3–5 uses for a family of 4)
- If bags aren’t available: bury waste at least 6 inches deep and 200 feet from any water source
Option 2: Compact Self-Contained Units — Best Mid-Range Choice
Nature’s Head ($950–$1,000)
The Nature’s Head is the gold standard for off-grid preppers, van lifers, and boat owners. It’s specifically designed around urine diversion — a separate front compartment collects liquid, while the rear composting chamber handles solids with peat moss or coconut coir as cover material. For a family of 4 using it as a primary toilet, the composting chamber needs emptying roughly every 4–6 weeks; the urine bottle every 2–3 days.
Key specs:
- Self-contained — no installation plumbing required
- Requires 12V power for the small fan (can run on a battery and solar panel)
- Crank handle for mixing the composting chamber
- Dimensions: 20″L × 17.5″W × 20.5″H — fits most bathroom spaces
- No chemicals needed — peat moss absorbs and composts naturally
Air Head Composting Toilet ($850–$900)
The Air Head is the closest competitor to the Nature’s Head. Similar urine-diversion design, similar size. Key differences: the composting chamber uses a hand crank to mix contents (vs. Nature’s Head’s more aggressive agitator), and the capacity is slightly smaller. Both are excellent; the Nature’s Head has a larger installed base and more documented long-term performance data.
Which to Choose for a Family of 4
For a cabin, off-grid home, or permanent bug-out location with 4 regular users, the Nature’s Head is the stronger choice. Its larger composting chamber, better agitator, and longer track record make it more appropriate for high-frequency family use. For a 2-person household or occasional-use property, either works well.
Option 3: Central Composting Systems — Whole-Home Solution
Central systems separate the toilet unit (which looks like a normal toilet) from the composting chamber, which is typically installed in the basement or a crawl space. Sun-Mar is the leading brand; their Excel Non-Electric model ($1,600–$2,000) requires no electricity and handles continuous household use.
These systems make more practical sense for:
- Primary residence that’s permanently off-grid
- Locations where local regulations permit composting toilets but not traditional septic
- Families who want the convenience of a normal-looking toilet without giving up the waterless benefit
The upfront cost is higher, installation is more involved, and emptying the composting chamber is a twice-yearly task rather than monthly. For most preppers as a backup system, this is more than necessary. For true off-grid homesteads, it’s worth the investment.
Installation: What Each Option Actually Requires
| System | Installation Complexity | What’s Required | DIY-able? |
|---|---|---|---|
| Bucket toilet | None | Nothing — it’s a bucket | Yes |
| Nature’s Head / Air Head | Minimal | Vent hose (through wall or ceiling), 12V power connection | Yes for most homeowners |
| Sun-Mar central system | Moderate | Composting chamber installation below toilet, vent stack to exterior | Possible, but installation manual is detailed and permit may be required |
Installing a Nature’s Head: Step-by-Step Overview
- Choose location: Any location with access to an exterior wall or ceiling for the vent hose, and a 12V power source (or battery bank with solar)
- Install vent hose: The included 1.5″ flexible vent hose exits through a wall or ceiling; a 12V fan pulls air from the composting chamber and exhausts it outside. This eliminates odor inside the room.
- Position and secure the unit: Bolt-down hardware is included; or use in freestanding configuration for portable setups
- Connect 12V power: 0.3A draw — minimal; compatible with any 12V battery, solar system, or vehicle power
- Add cover material: Fill the composting chamber with 2–3 gallons of peat moss or coconut coir before first use
Maintenance Schedule
| Task | Frequency | Time Required |
|---|---|---|
| Empty urine container (Nature’s Head/Air Head) | Every 2–3 days (family of 4) | 2 minutes |
| Turn/agitate composting chamber | After every few uses, or daily | 30 seconds |
| Add cover material if needed | Weekly check | 5 minutes |
| Clean interior surfaces | Monthly | 15 minutes |
| Empty composting chamber | Every 4–6 weeks (family of 4) | 20–30 minutes |
| Inspect vent fan and hose | Quarterly | 10 minutes |
Composting chamber contents, when fully composted, look like dark soil and have no offensive odor. They can be buried in a garden bed (not food-crop areas) or disposed of per local regulations.
Legal Considerations
Composting toilet legality varies significantly by jurisdiction:
- Most U.S. states: Composting toilets are legal as a secondary system — you still need a septic system or sewer connection. Some states (Oregon, Washington, Colorado, and others) explicitly permit composting toilets as primary systems in certain rural zones.
- Canada: Provincial regulations vary; many rural areas permit them with a permit
- Urban areas: Most municipalities require connection to city sewer — composting toilets are legal as secondary systems but not as a replacement for sewer connection
For emergency preparedness use (keeping a bucket toilet or Nature’s Head as a backup when the municipal system fails), there are no legal complications — you’re not altering your home’s plumbing or disconnecting from city services. For permanent installation as a primary system, check your county health department before purchasing.
Common Mistakes in Composting Toilet Setup
1. Skipping the urine diversion
Mixing urine and feces in a composting chamber creates the wet, anaerobic conditions that cause odor and slow or stop decomposition. All quality composting toilets divert urine — don’t purchase or build a system that mixes them.
2. Using too little cover material
Cover material (peat moss, coconut coir, sawdust) absorbs liquid and provides the carbon balance needed for decomposition. Skimping on it is the primary cause of odor problems. More is almost always better for the composting side.
3. Not ventilating properly
A composting toilet without proper venting — a fan that creates continuous airflow from the composting chamber to the outside — will smell. This is the most common complaint from people who report bad experiences. The fan is not optional; it’s what makes the system livable.
4. Waiting until an emergency to try it
Your first time using a composting toilet should not be during an actual emergency. Set it up, use it for a weekend, empty it, and understand how it works. Finding out there’s a problem with your vent installation during a power outage is not the time to troubleshoot.
5. Not having a backup for the backup
Even the most reliable composting toilet can fill up, break, or become temporarily unusable. Have a simple bucket toilet kit as an emergency backup for your composting toilet. Belt-and-suspenders applies to sanitation same as everything else.
FAQ
Does a composting toilet actually smell?
A properly set up composting toilet with urine diversion and functioning ventilation does not smell significantly worse than a conventional toilet — often better. The fan creates negative pressure in the composting chamber, pulling any gases out through the vent before they enter the room. Problems occur when the fan fails, the vent is blocked, or there’s too little cover material. These are solvable maintenance issues, not fundamental design flaws.
How often does a Nature’s Head need to be emptied for a family of 4?
The composting chamber typically needs emptying every 4–6 weeks with 4 full-time users. The urine container needs emptying every 2–3 days. Some families find the urine container frequency slightly inconvenient — this is the main real-world complaint. Families with 2 users can go 8–10 weeks between composting chamber empties.
Can I use this in an apartment as emergency backup?
Yes — a bucket toilet kit works in any space. A Nature’s Head requires a vent penetration (through a wall, ceiling, or even a dryer vent hole), which makes it less practical in rentals. The bucket kit requires no installation and stores in a closet until needed. For apartments, start with the bucket kit; it handles weeks of emergency use without issue.
What do I do with the composted waste?
Fully composted material from a composting toilet (dark, soil-like, no offensive odor) can be buried in non-food-garden areas or disposed of according to local solid waste regulations. It should not be used on vegetable gardens without further processing. In a grid-down emergency, deep burial (18+ inches) at least 200 feet from any water source is the appropriate method.
Bottom Line
Start with a $40 bucket toilet kit this week — it handles any short-term emergency and takes 5 minutes to assemble. If you have an off-grid property or want a water-free primary system, the Nature’s Head is the proven family choice at under $1,000. Either way, have a plan for waste before the water goes out — it’s the preparedness category that people ignore until they’re desperately improvising.
Dan Lockland is a preparedness instructor and survival skills educator with over 15 years of hands-on experience. He shares practical, no-nonsense guidance on emergency preparedness, self-reliance, and sustainable living at PreparingWithDan.com.